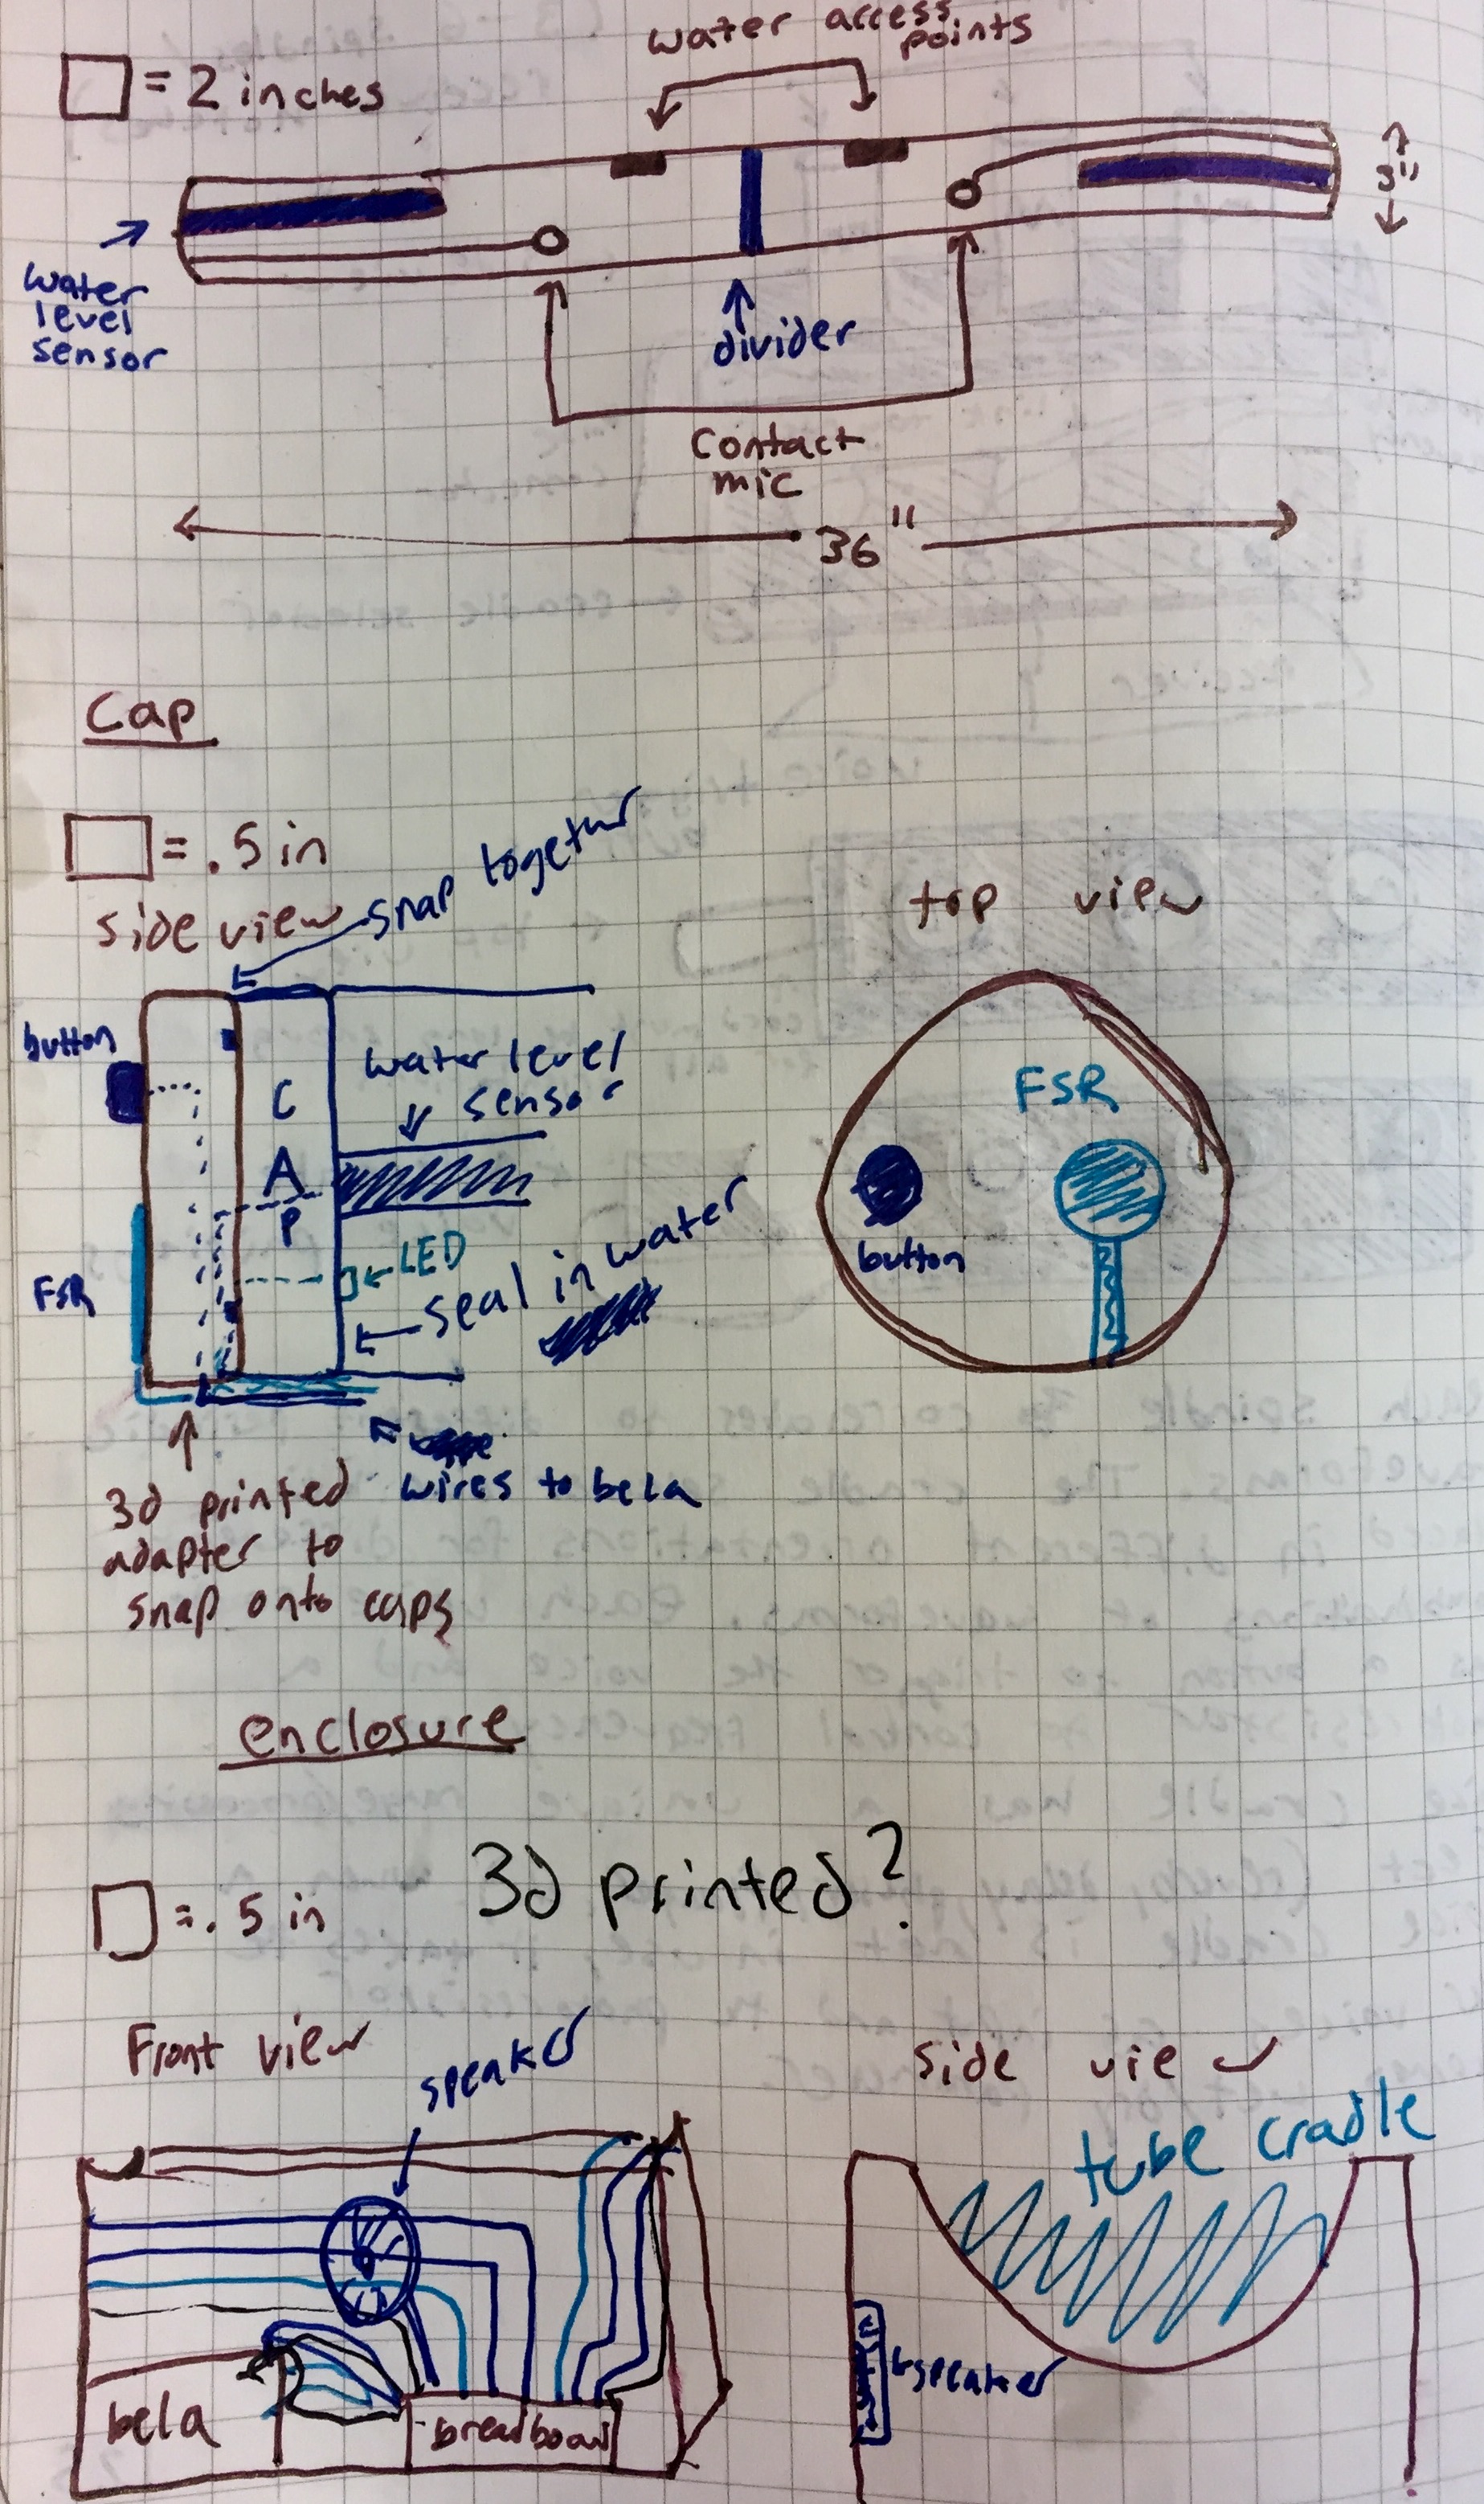
I’ve decided to go along with the AquaTube idea, and have begun laying out how the instrument will be constructed. I’ll be using a 3 foot acrylic tube, which will have a divider in the middle in order to separate the two sides and have a more interesting sounding splash. I want to be able to change out the water after everything has been constructed, so I’ll put a water access point on each side of the divider. I’ll do this by drilling a hole on each end and plugging it with a watertight, snug-fitting stopper.
On each side there will be a water level sensor and a contact microphone. These inputs will be inside the tube, but their wires will exit through the cap. I’ve bought two watertight caps for the ends, but will be 3D printing a custom adapter to snap on to the end of the cap to house the button and FSR inputs, as well as the wiring from the water sensor, contact microphone, and LED.
The enclosure that will house the Bela will be curved to fit perfectly under the tube. This enclosure will house the bela, a breadboard, and a speaker. I’m debating 3D printing this as well to get the right fit underneath the tube. Check out some sketches below: