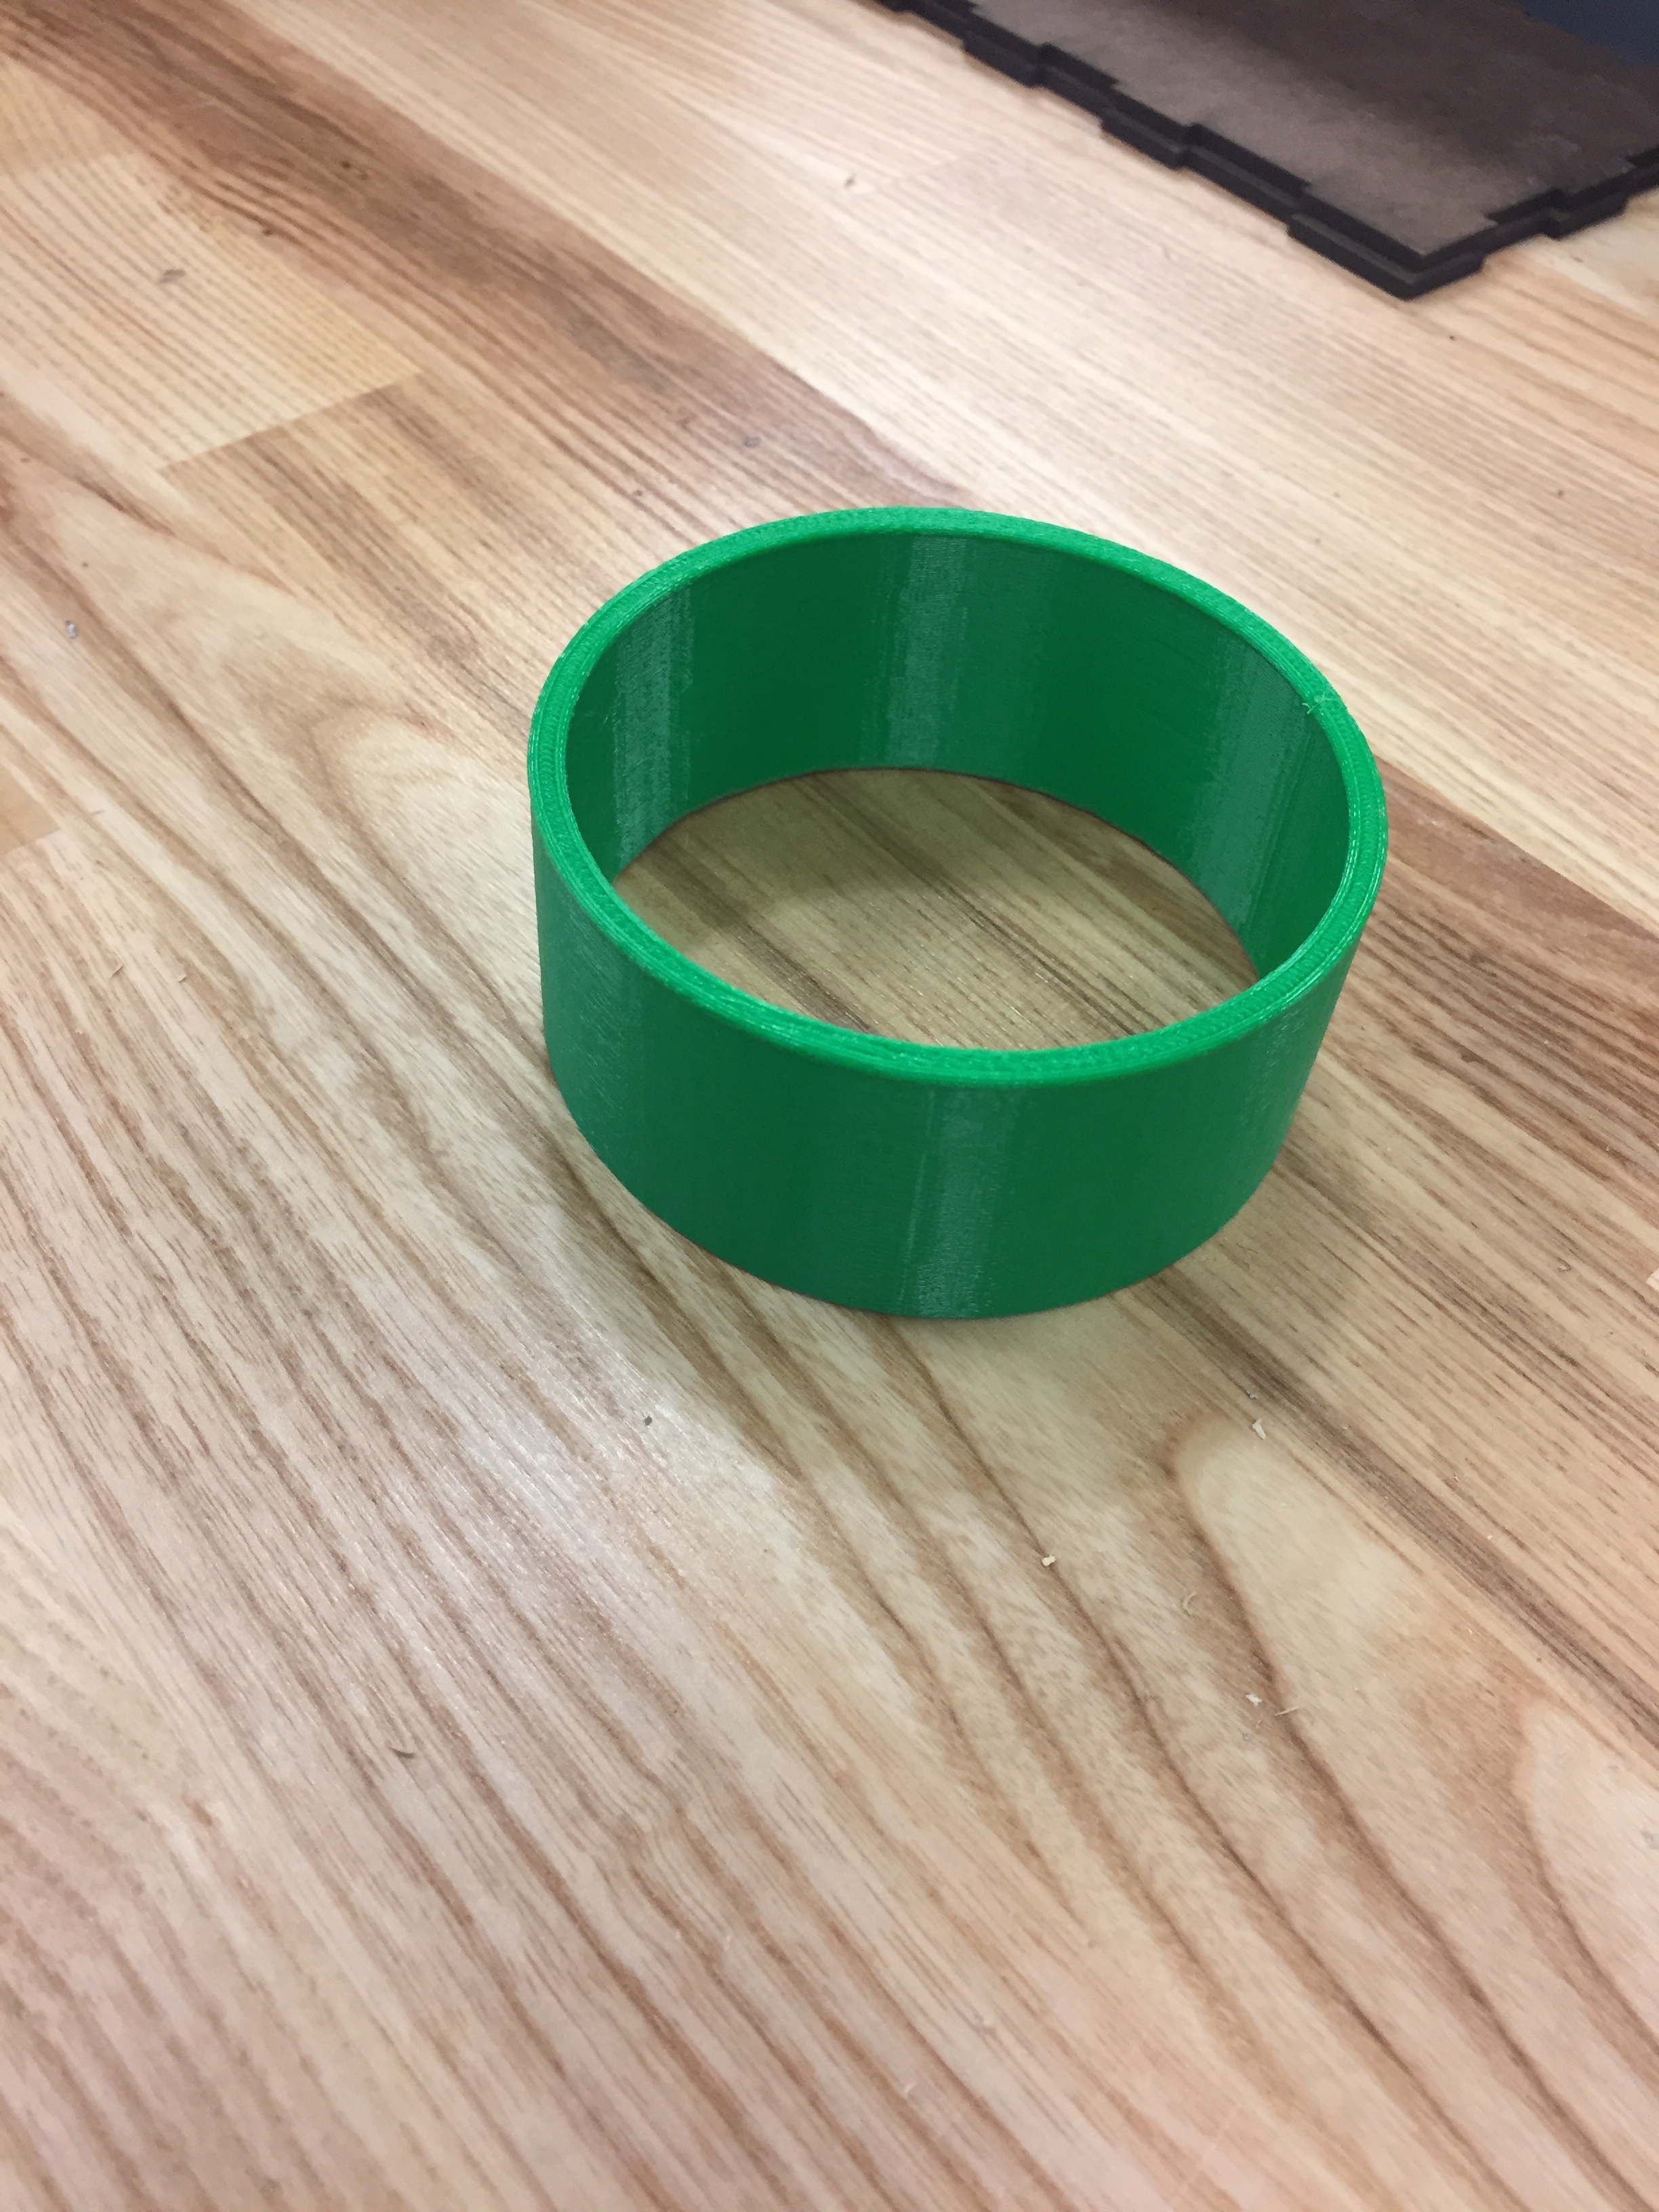
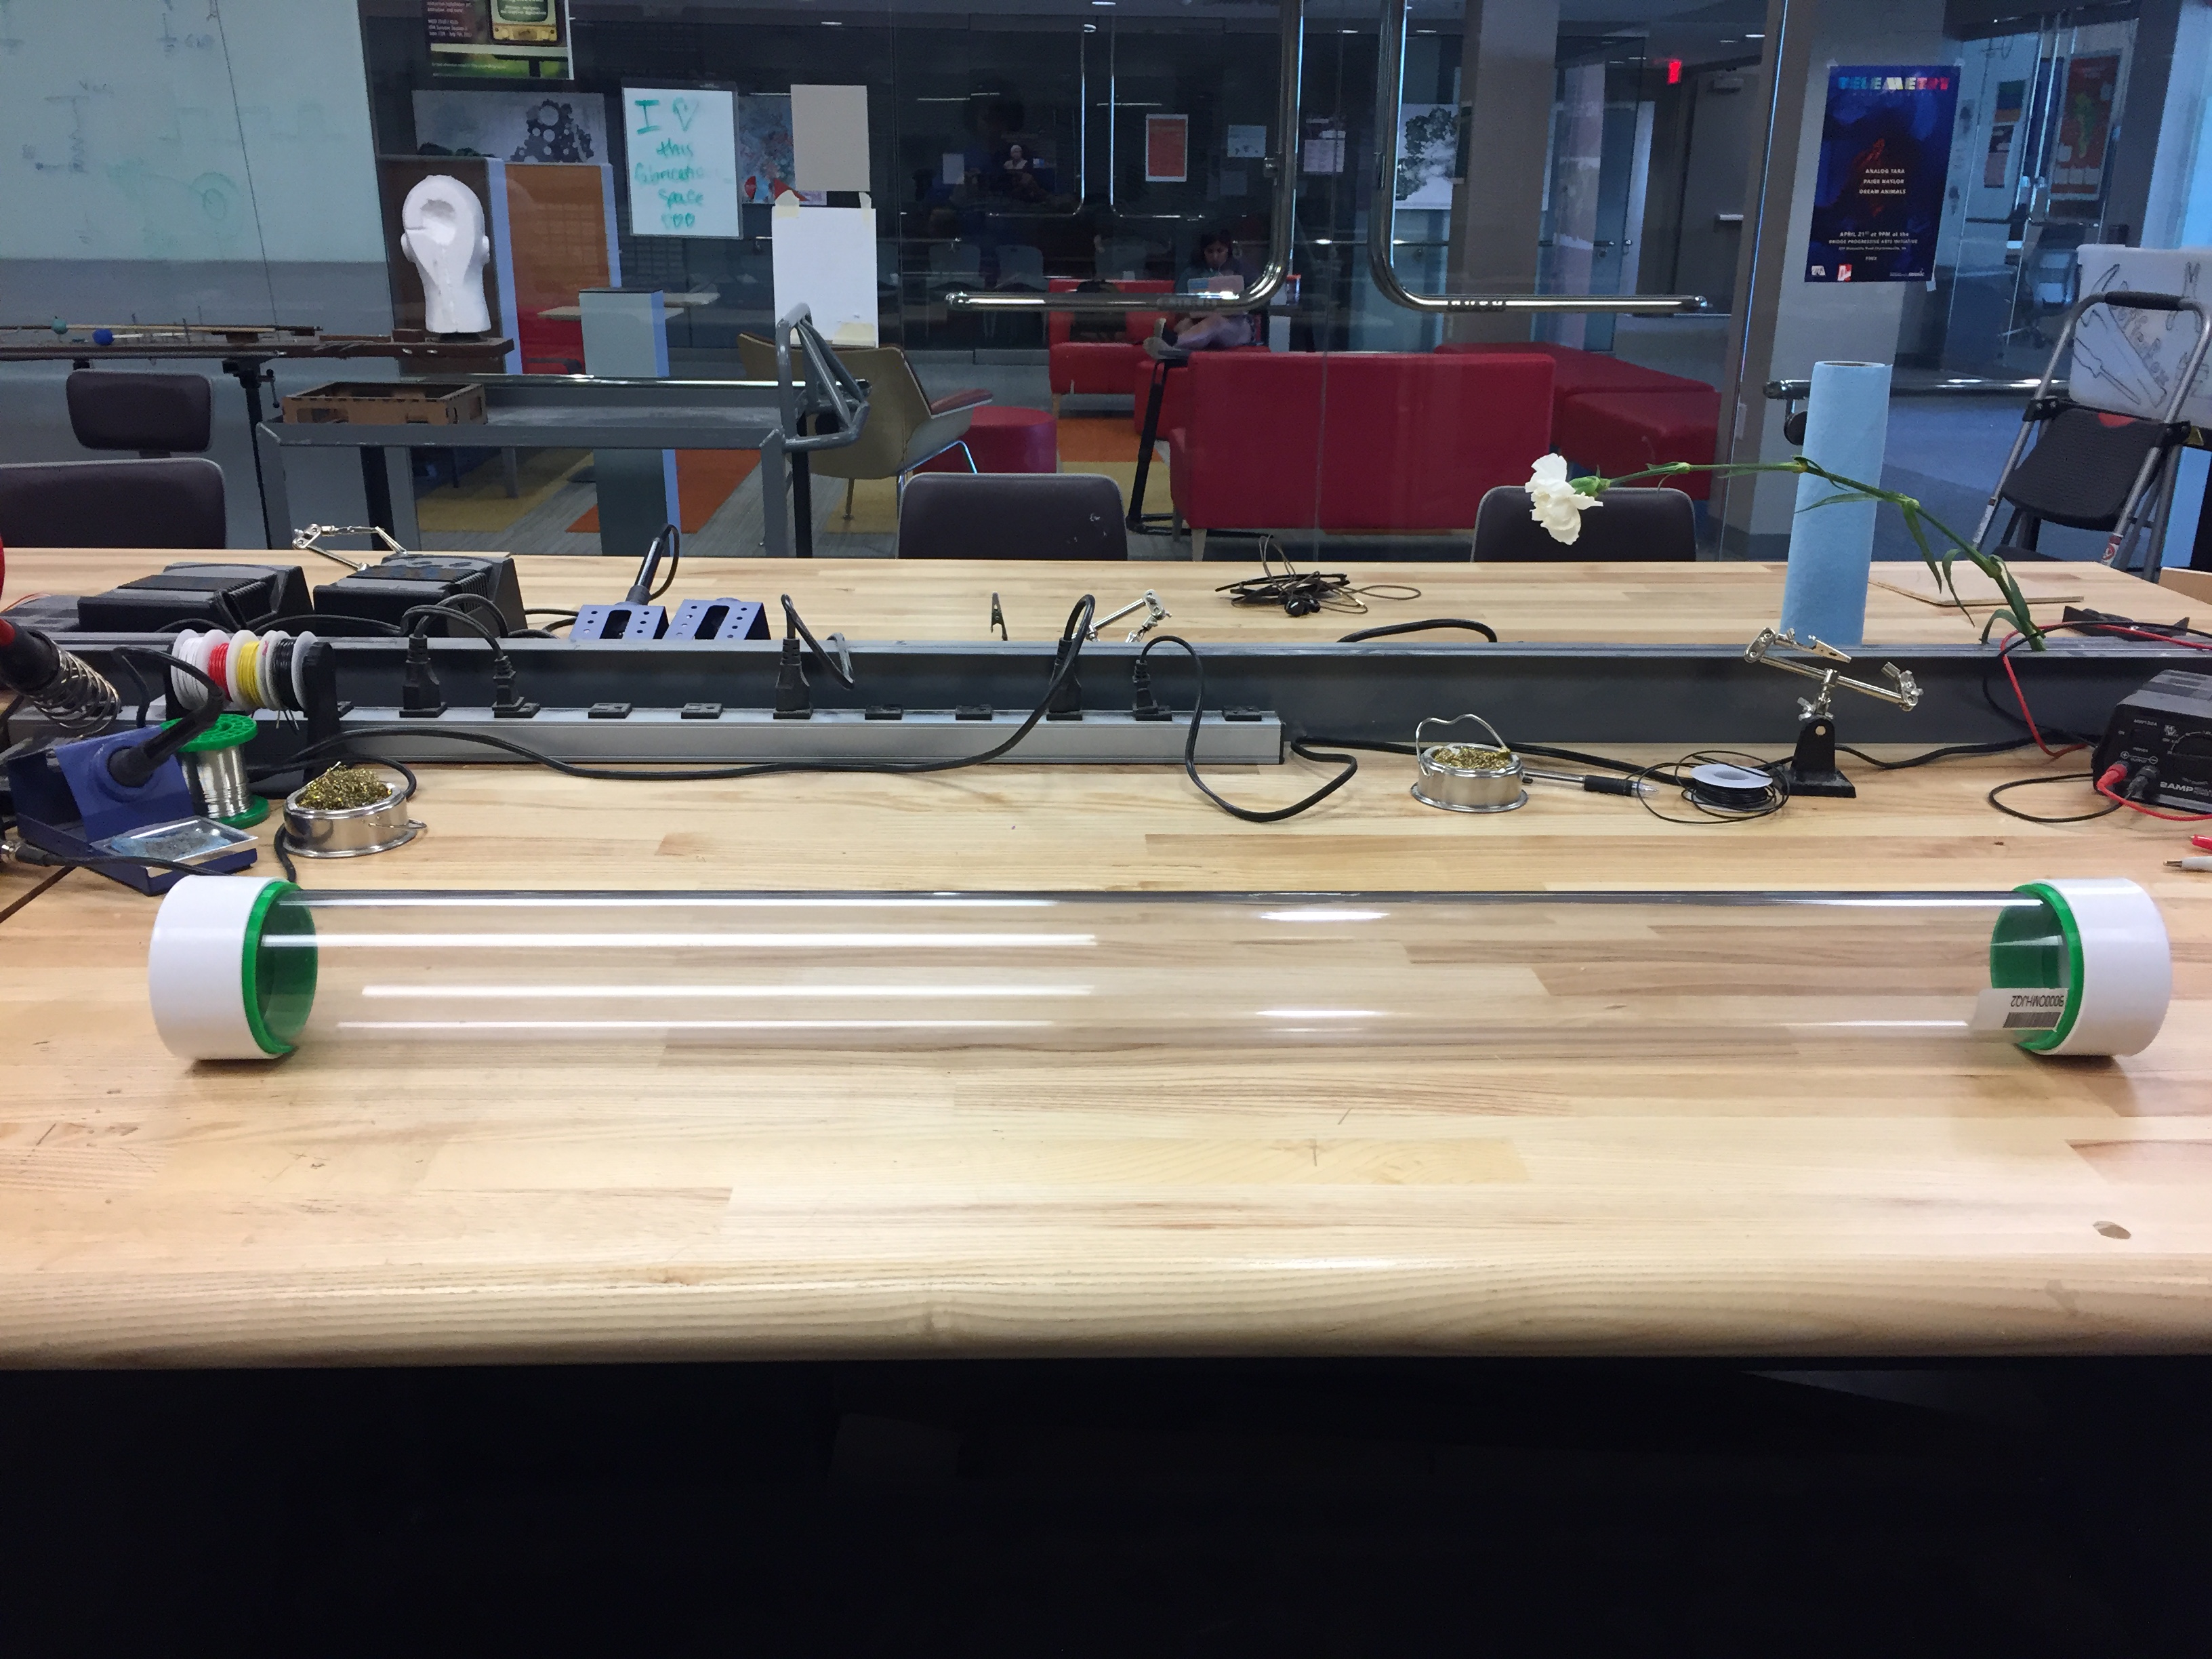
Well, I’ve run into an annoying problem, as expected. The PVC caps I ordered do not fit onto the plastic tube as I had expected. The caps are listed as 3 inches in diameter, but in reality they are 3.25 inches in diameter. This poses a bit of a problem in terms of waterproofing. In order to fix this issue, I have designed a 3D-printed ring which serves as a buffer between the tube and the cap. The ring needs a bit of sanding around the edges to make it fit perfectly, but once on the tube it’s a pretty great fit!
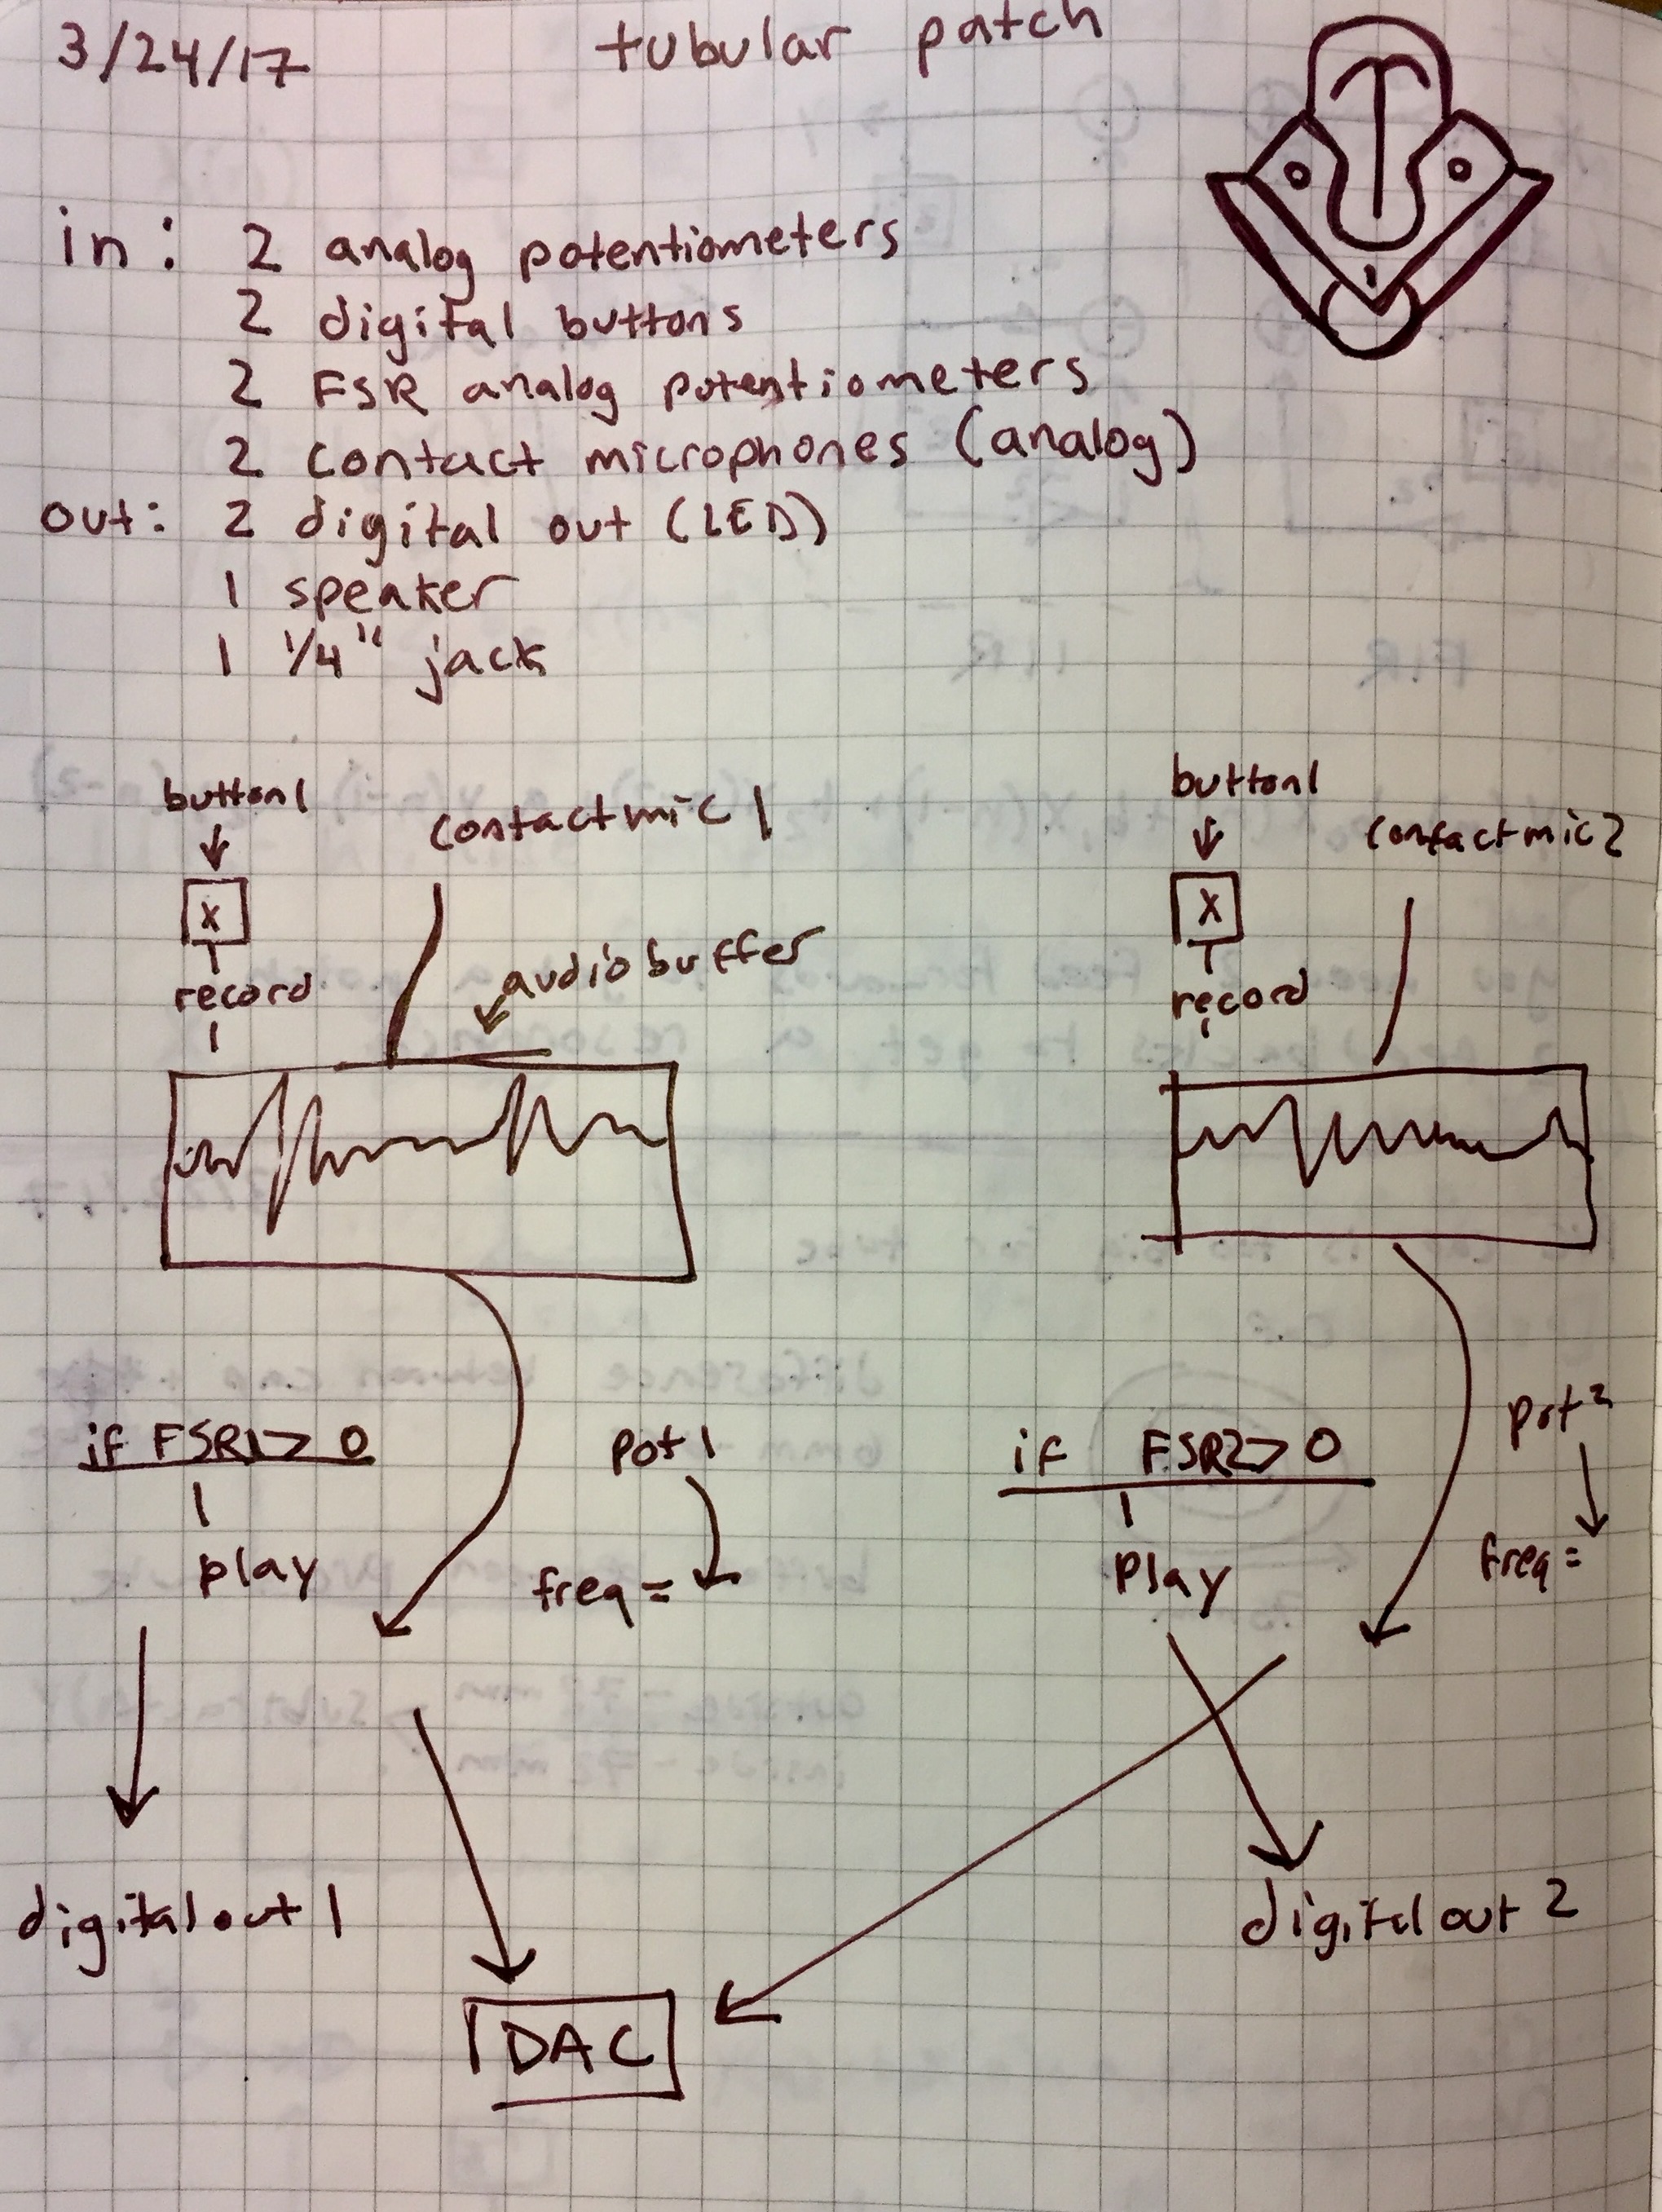
This is a preliminary patch for the aquaTube instrument. It uses two analog variable resistors (water level sensors), two digital buttons, two analog force sensitive resistors (FSR’s), two contact microphones, and has two UV LED outputs as well as a small speaker and 1/4” audio output.
Pressing and holding a button will begin recording audio from the contact microphone into a buffer. Once the button is released, the recording stops. When the FSR is pressed, the audio will begin to playback on a loop. The strength of the FSR press will directly correlate to the volume of playback and will also trigger the LED which will be dimmer on a lighter press and brighter on a stronger press. The frequency of the playback will correlate to the water level sensor value.
This will be the same on both sides of the instrument, creating a polyphonic sound.
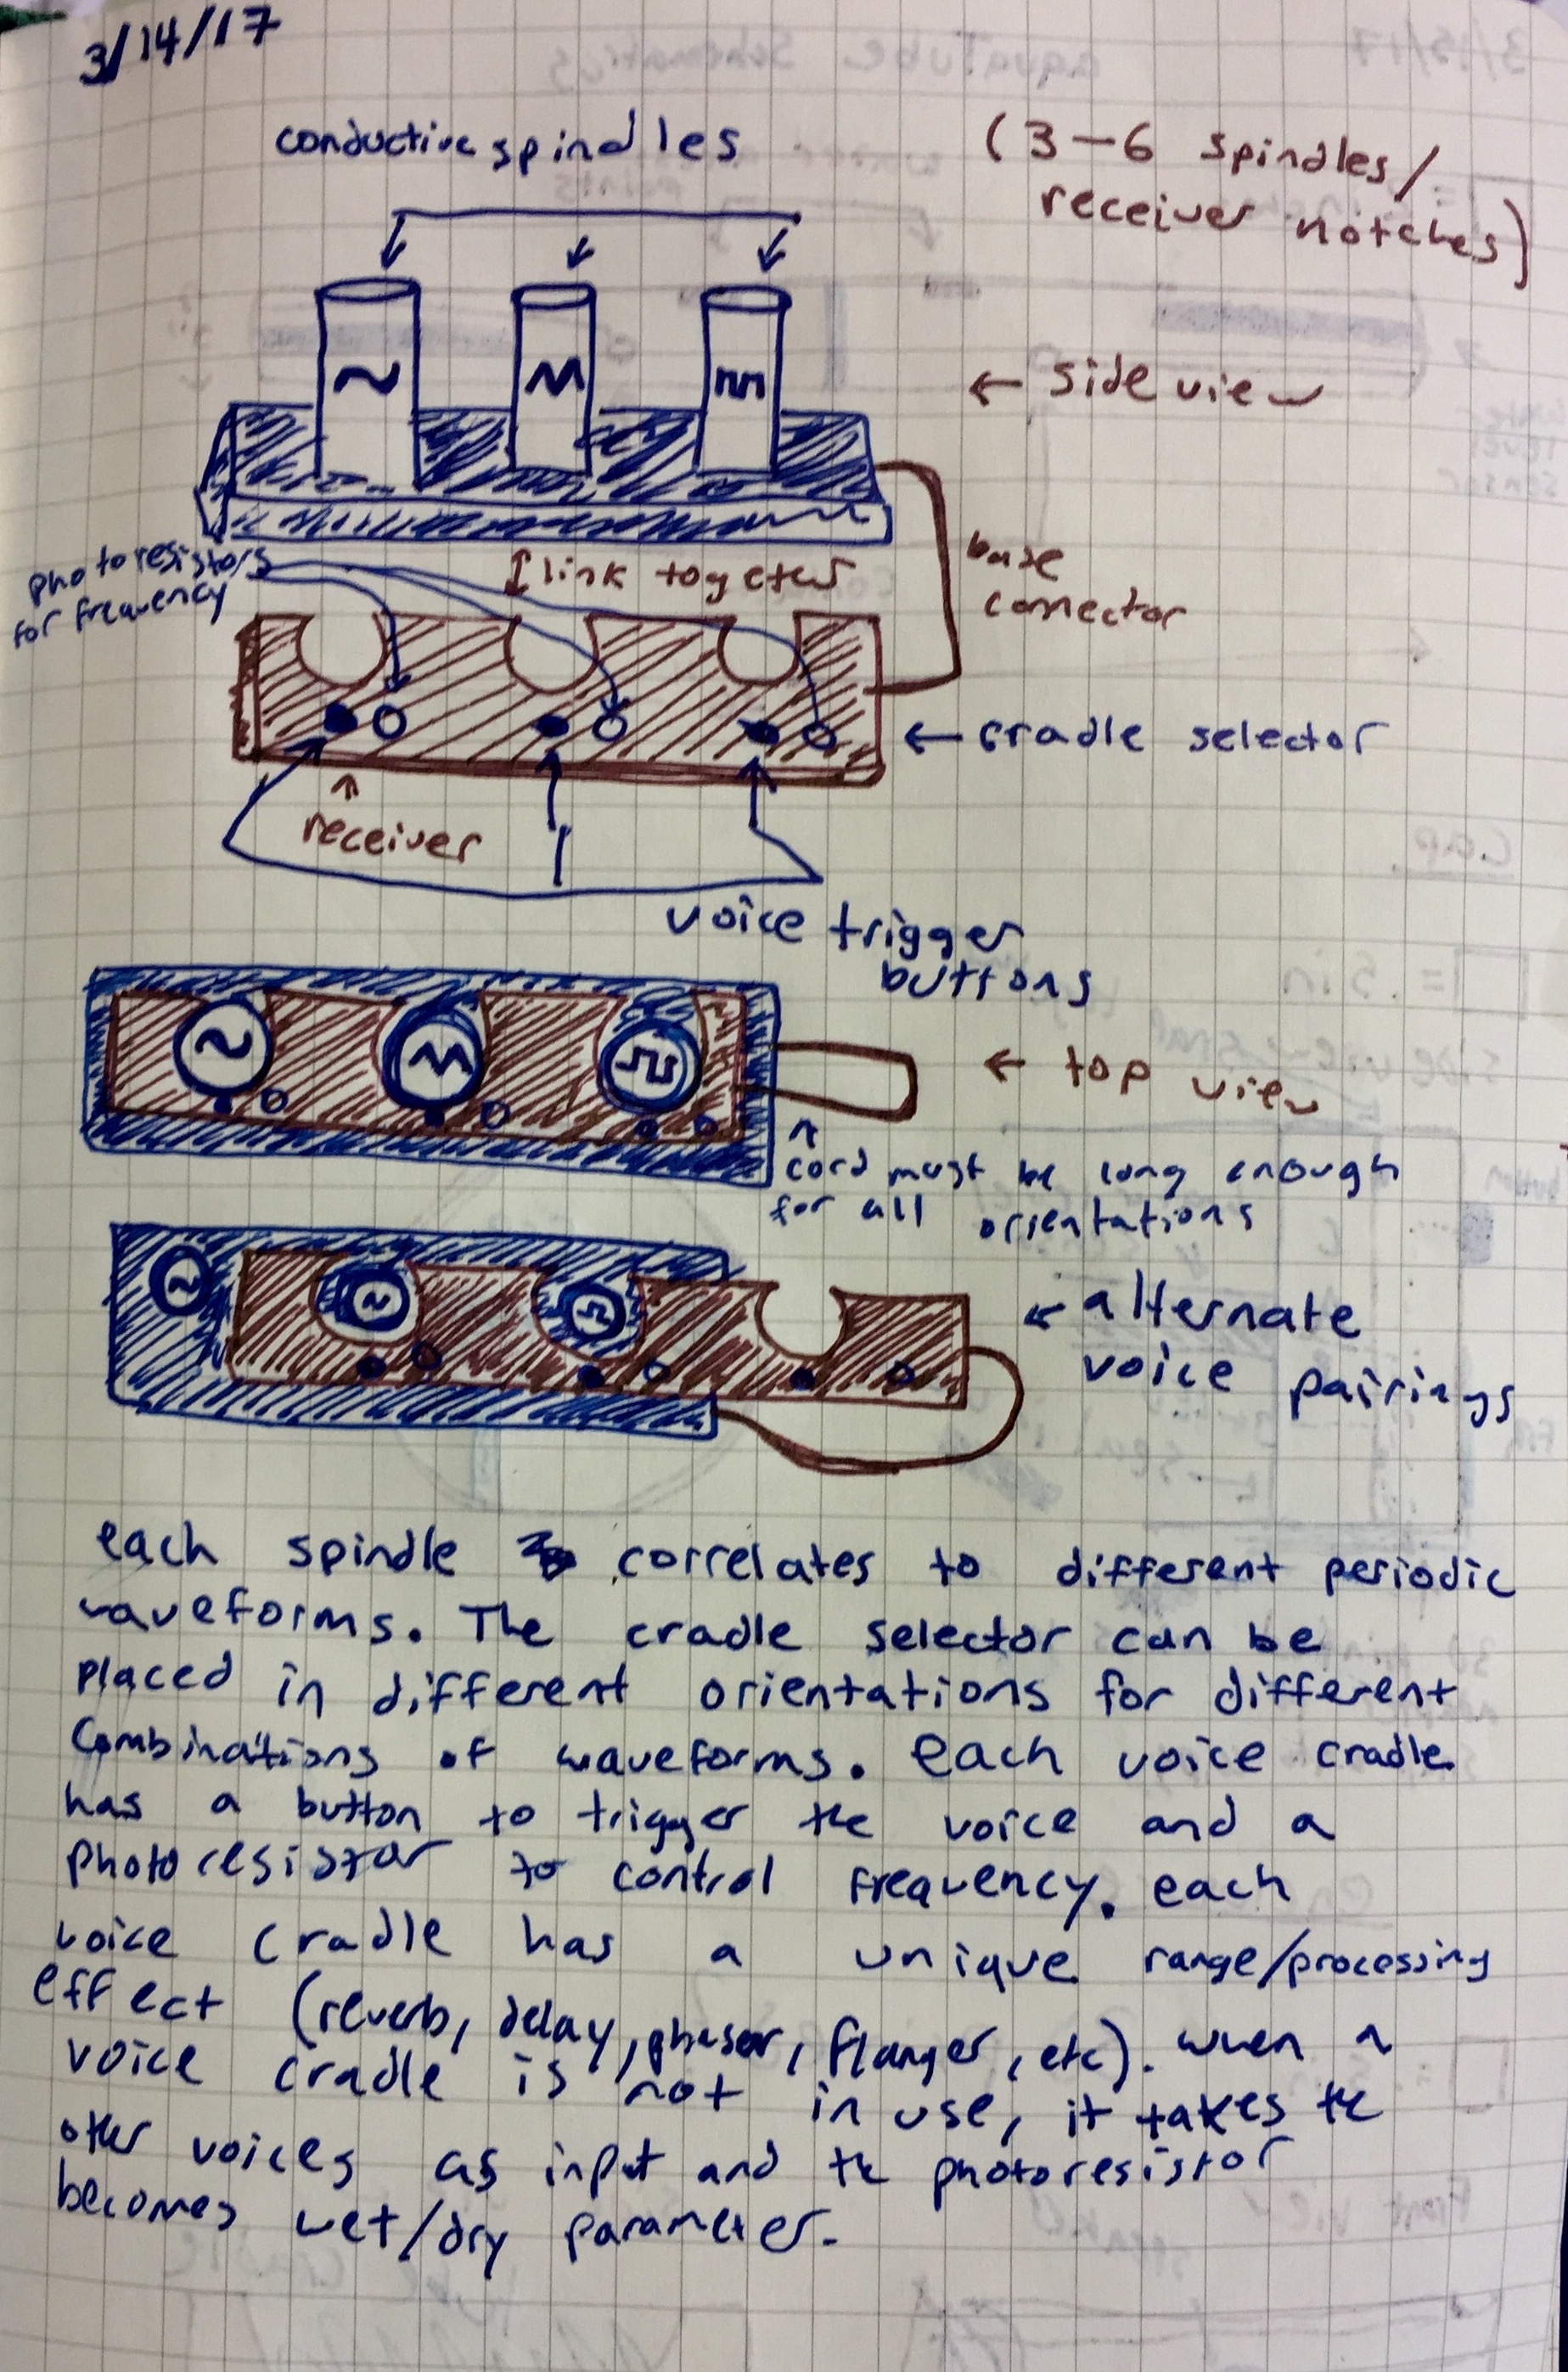
This instrument would feature several wooden spindles which each correlate to a different type of waveform. One spindle would contain a sine wave, one would contain a sawtooth wave, one would contain a square wave, etc. Each wooden spindle would be wrapped in some conductive material – maybe copper foil. Each spindle would emerge from the base unit which would house all the electronics, as well as a connector to the cradle selector.
The cradle selector would have several holes corresponding to the number and shape of the spindles. The spindle cradle will be lined with a conductive material as well, so placing the cradle on a spindle will result in a closed circuit, which can be recognized by the Bela. Each spindle cradle hole corresponds to a certain sound effect, such as reverb, chorus, flanger, distortion, etc. The cradle selector would also have a photoresistor and a button next to each slot.
In order to perform the instrument, the user would place the cradle on the spindles in one of many different placements. Each cradle becomes a voice that can be triggered by pressing the button, with the photoresistor changing the frequency of the waveform associated with that spindle. Depending on which spindle is touching which cradle, that waveform will be processed by the effect of the associated cradle. When a cradle is not connected to a spindle, it becomes a wet/dry parameter using the photoresistor as input.
I’ve decided to go along with the AquaTube idea, and have begun laying out how the instrument will be constructed. I’ll be using a 3 foot acrylic tube, which will have a divider in the middle in order to separate the two sides and have a more interesting sounding splash. I want to be able to change out the water after everything has been constructed, so I’ll put a water access point on each side of the divider. I’ll do this by drilling a hole on each end and plugging it with a watertight, snug-fitting stopper.
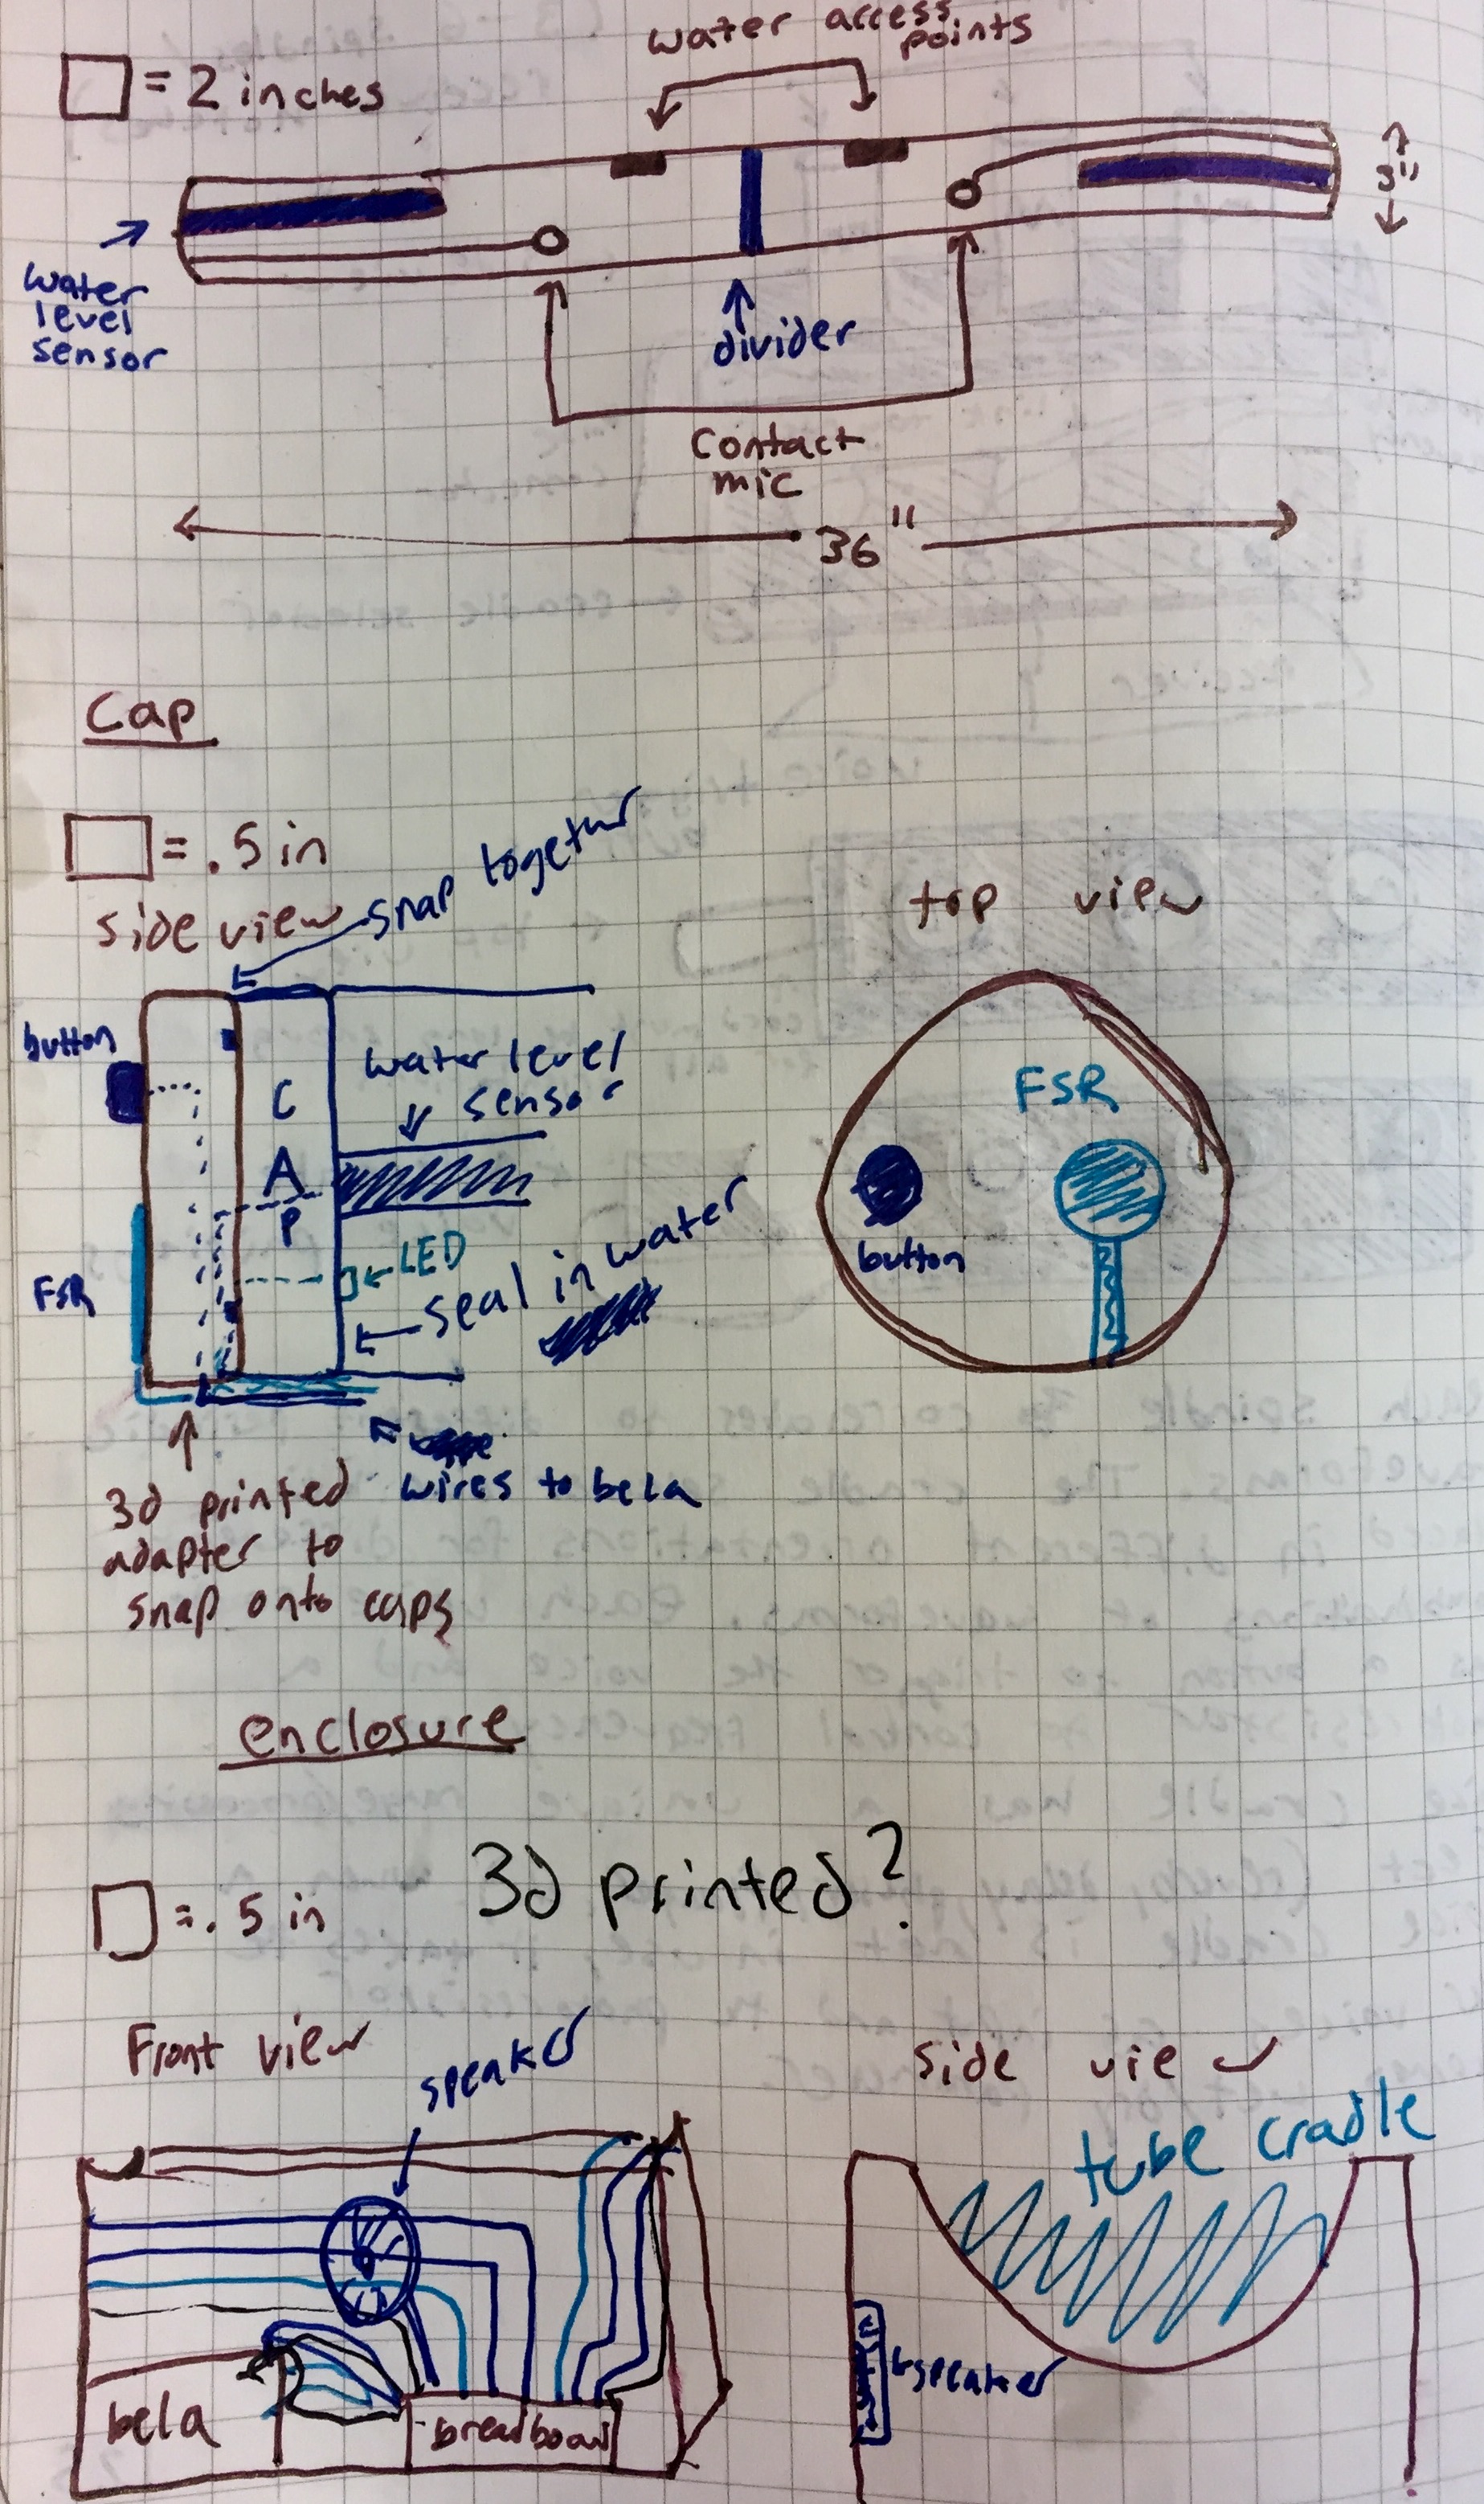
On each side there will be a water level sensor and a contact microphone. These inputs will be inside the tube, but their wires will exit through the cap. I’ve bought two watertight caps for the ends, but will be 3D printing a custom adapter to snap on to the end of the cap to house the button and FSR inputs, as well as the wiring from the water sensor, contact microphone, and LED.
The enclosure that will house the Bela will be curved to fit perfectly under the tube. This enclosure will house the bela, a breadboard, and a speaker. I’m debating 3D printing this as well to get the right fit underneath the tube. Check out some sketches below:
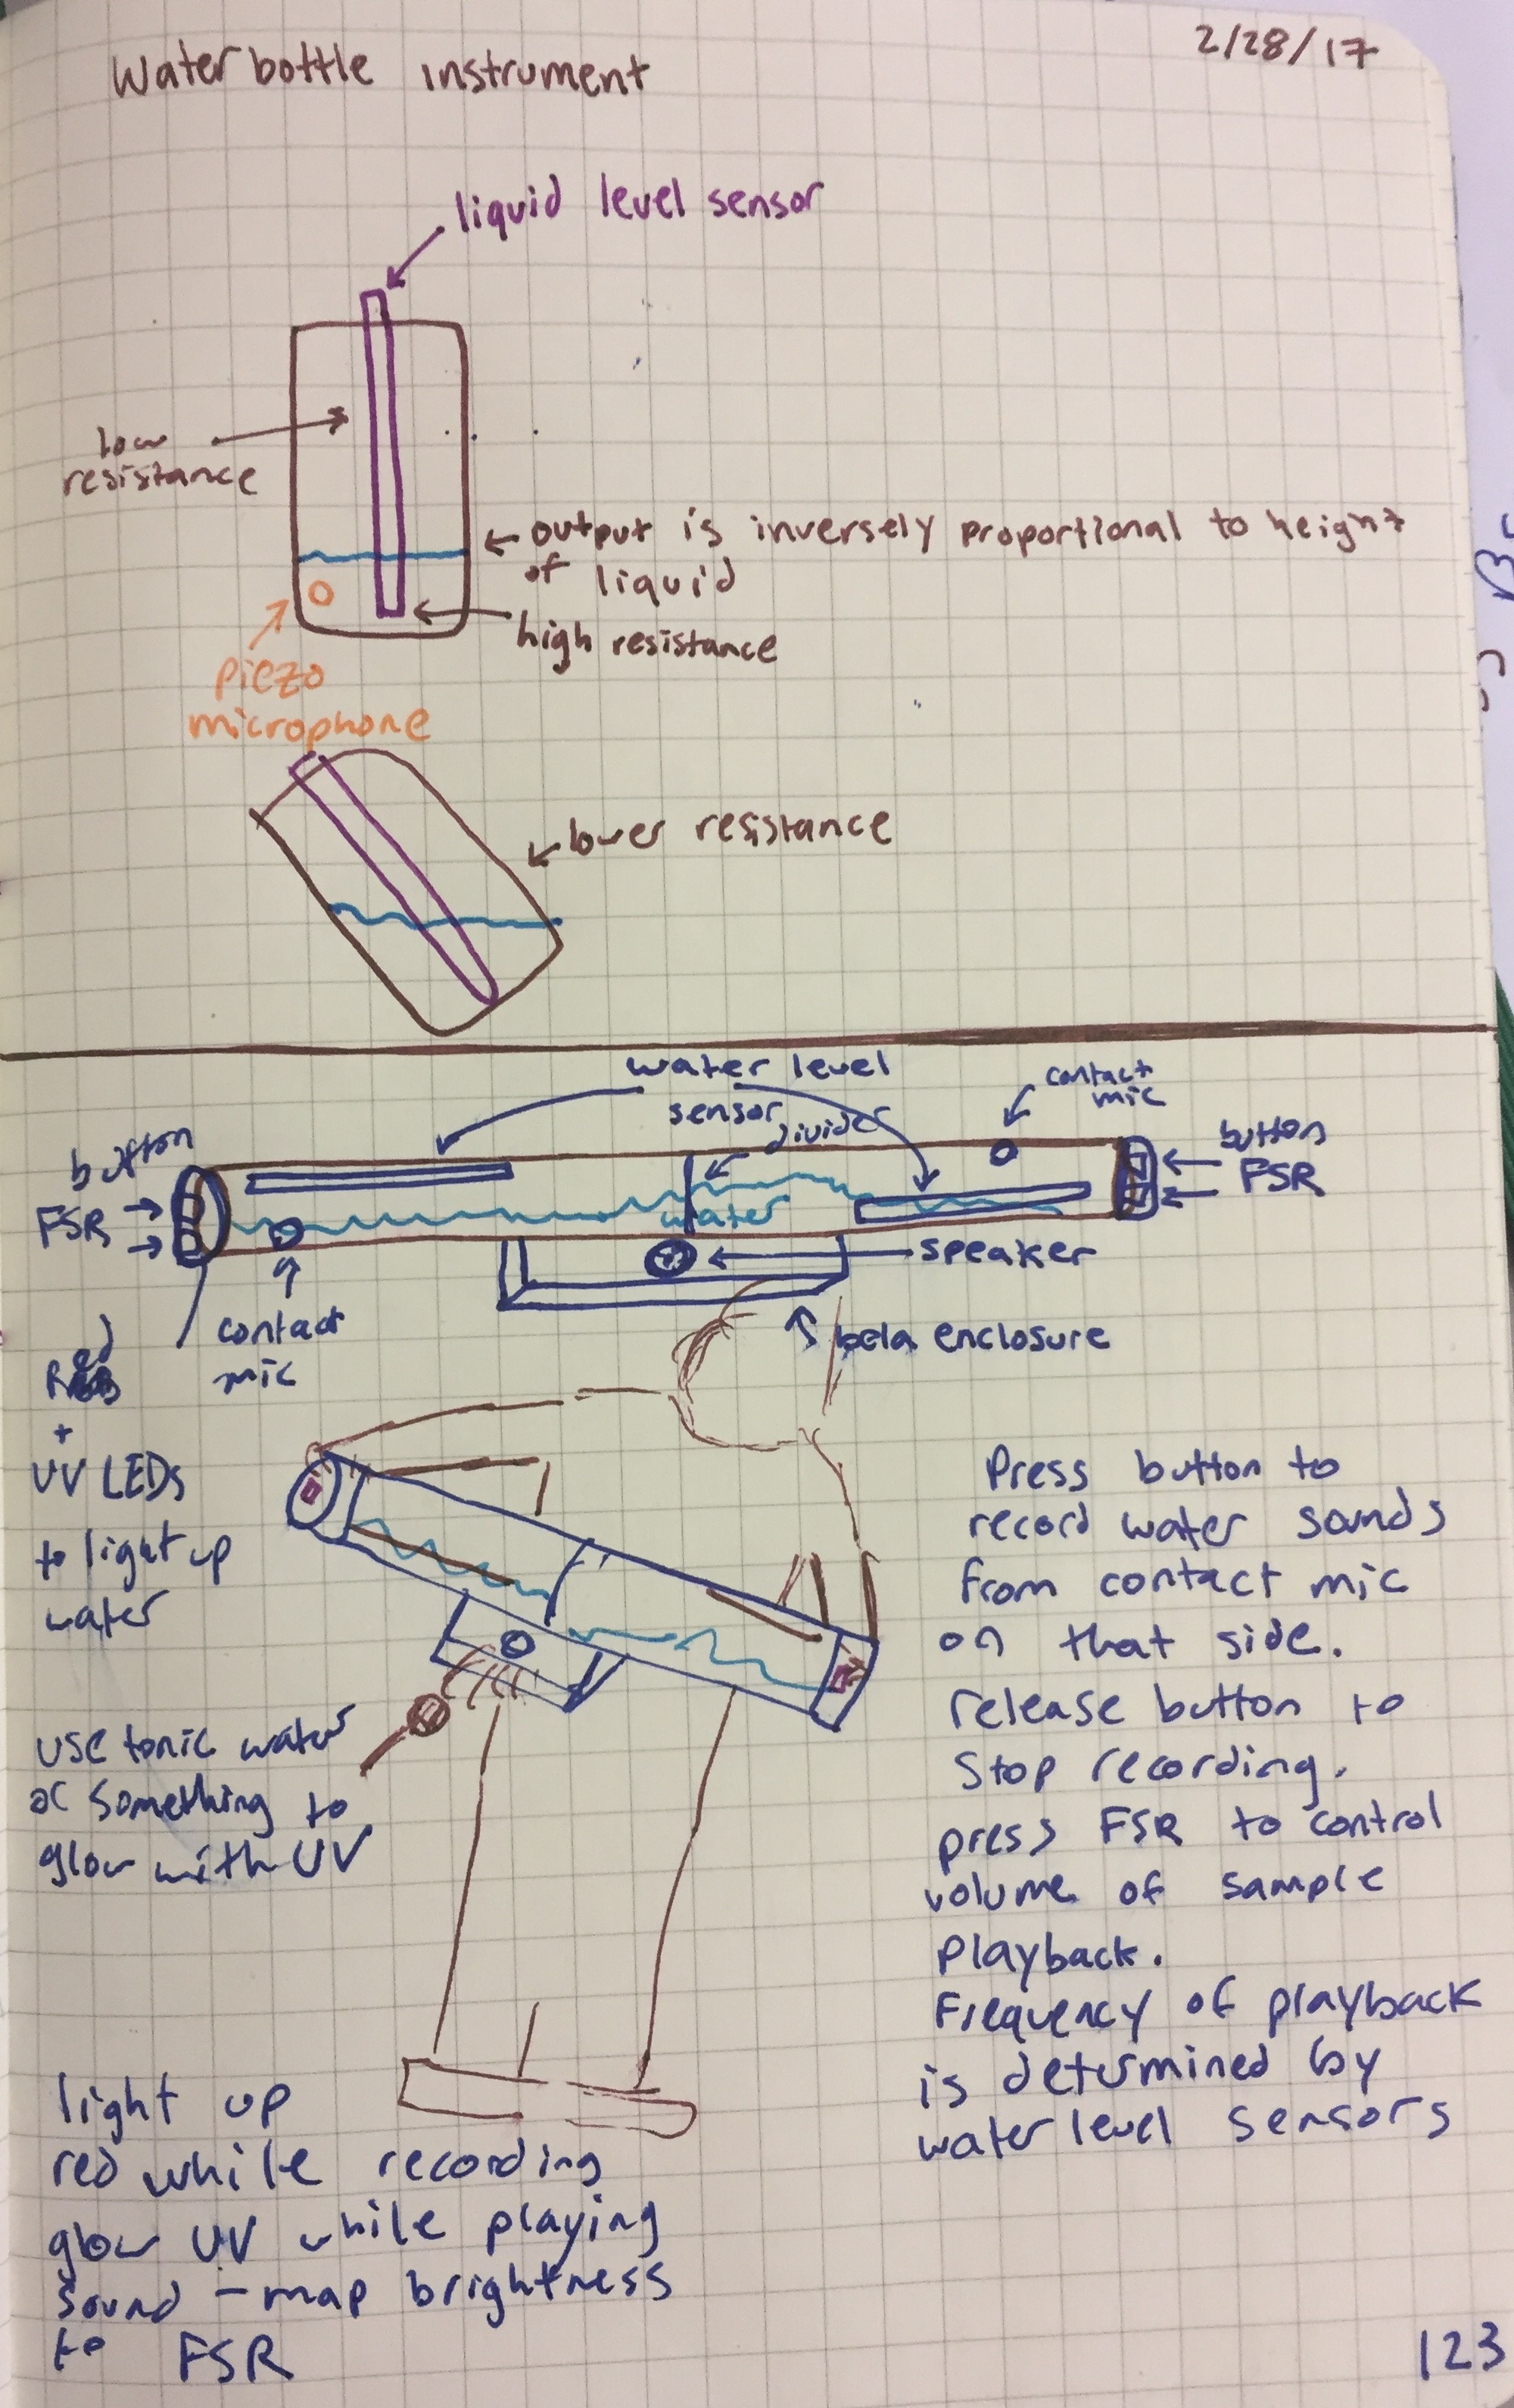
The idea I’ve decided to pursue involves water or liquid inside a clear acrylic tube. This idea originated as an instrument contained within a water bottle, but I think a longer plastic tube will yield better results. The device will use two liquid level sensors, two force sensitive resistors, two contact microphones, and two buttons to create sound.
aquaTube Sketch
The user will hold the tube horizontally, with their hands on the caps on either end. On each cap there will be both a tactile button and a force sensitive resistor (FSR). There will also be two LED’s on the inside of each cap: one red and one ultraviolet. Inside the tube there will be two contact microphones and two water level sensors, one on each side. Below the tube there will be a small box which will contain the bela, a breadboard, and the bela’s power source.
The user will press the button to record a sample of the contact microphone on that side, recording the sloshing, bubbling, watery sounds. When recording, the red LED will turn on, causing the tube to glow red. When the user releases the button, the recording will be saved into a buffer in PD on the Bela. When the user presses the FSR, it will trigger repetitive playback of the recorded sample. The harder the user presses the FSR, the louder the playback will be. The frequency of this sample playback will be determined by the water level sensor. When a sample is being played, the UV LED will glow according to how hard the FSR is pressed. The tube will be filled with some sort of liquid that glows under blacklight (tonic water or flourescent paint mixed with water), so the whole tube will glow blue when the sound is played.