Waveshaper Update

After thinking more about my waveshaping idea, I have made some updates. First off, the Bela cannot handle the number of inputs I mentioned in the post, but with less inputs there would be a loss in the waveshaping quality. To account for this I have sketched out some other possibilities.

Waveshaper Sketch

The first sketch involves two slider potentiometers and a button to toggle overwriting. The horizontal slider will cycle through the array slots, and the vertical slider will correspond to the amplitude value at that slot. The button will dictate when to overwrite at the corresponding sample index.

The second sketch shows a similar concept but using a circle. This would have a rotary encoder in the center, with a piece of string tied to it and some sort of knob that is in a circular groove. This would allow the user to spin the peg or knob around the circle, rotating the encoder and drawing a sinusoid into the table.

The last small thought would be to use a magnetometer sensor. This sensor from Sparkfun can sense the X/Y/Z coordinates of a magnet and could be useful for this project. By holding a magnet over the surface, I could draw the waveform in the air, resulting in a clearer wavetable.

Beeping Bela

Beeping Bela

For my first project using the Bela, I 3D-printed an enclosure to fully contain the bela, and all its wiring and inputs. In order to create this case, I found an existing box for the Beaglebone Black and modified its SCAD file to make it much taller. You can download this modified SCAD file and associated files here.

After printing the case, I realized the Bela would not fit with such high walls. After feverishly trying to stuff the Bela into the cylinder, I decided to separate the cylinder and the and bottom part of the case by sawing it off entirely.

The bottom and sides of the case

Once I had the case printed, I drill pressed some holes in the lid for access to potentiometers, buttons, LED’s and the audio jack. I then glued and screwed all the components to the lid for a sturdy fit.

The lid with inputs and outputs attached

I then prepared a proto-cape for the beaglebone by soldering headers pins onto the sides and soldering the inputs onto the board. Since the analog inputs on the bela are covered by the board, I pushed the wire connected to the potentiometers through the board into the bela’s inputs.

The proto-cape

Once everything was soldered together, I attached the cape and all the inputs and shoved everything into the box.

The finished product!

Once everything was in the box, I started working on the Pure Data patch. I wanted something that would randomly generate tones based on the analog and digital inputs and would generate some sort of meaningful response from the LED’s. Below is a rough sketch of the patch I created:

A sketch of the PD patch

The patch has two oscillators – a sine wave in the left channel and a sawtooth in the right channel. The buttons toggle which waveform is sounding. The left potentiometer controls the speed of note generation, and the right potentiometer controls the randomness (what range of frequencies can be generated from 50-800hz).

You can download the PD patch here.

Video performance coming soon!

3D printed Bela enclosure

For my first project using the Bela, I wanted to 3D print a custom case using the Makerbot Replicator. This case will house the Bela, as well as two digital inputs (buttons), two digital outputs (LED’s), and two analog inputs (potentiometers). The sketch below shows the plan for the enclosure:

Bela Enclosure

The enclosure will have openings for access ports for the Bela on the bottom, and the top will have a snap-on lid with holes for buttons, potentiometers, and LED’s.

A few ideas for new musical instruments:
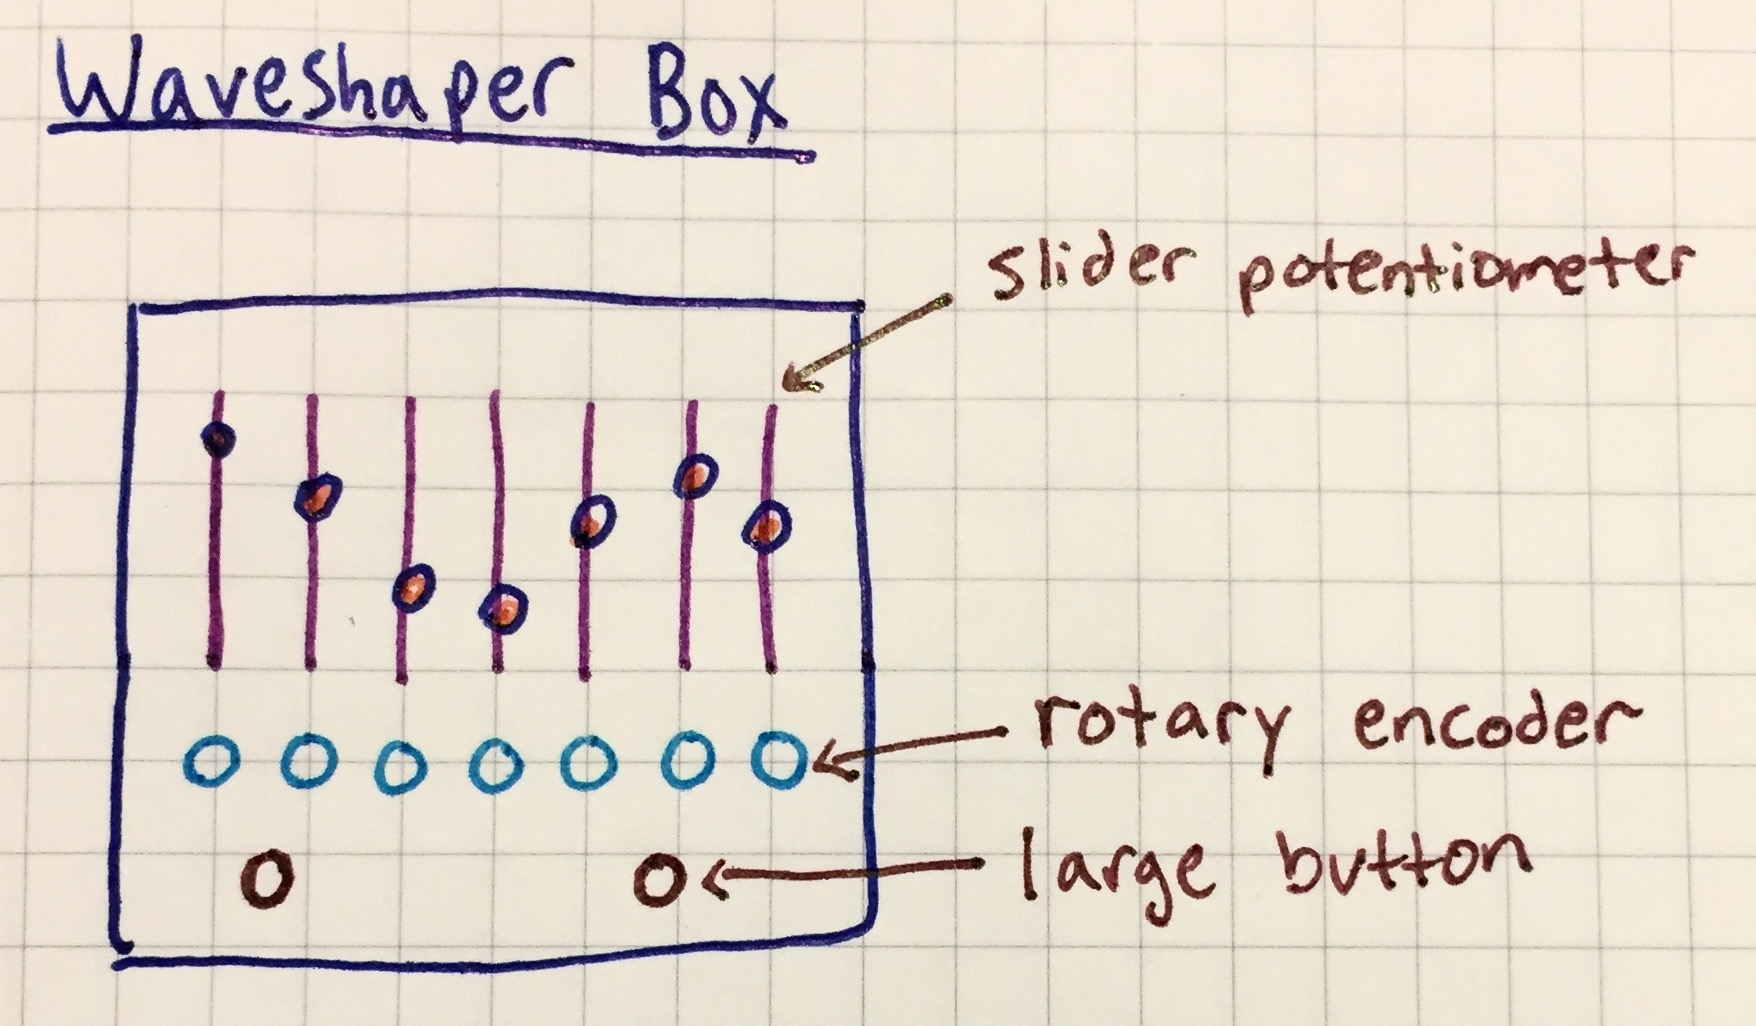
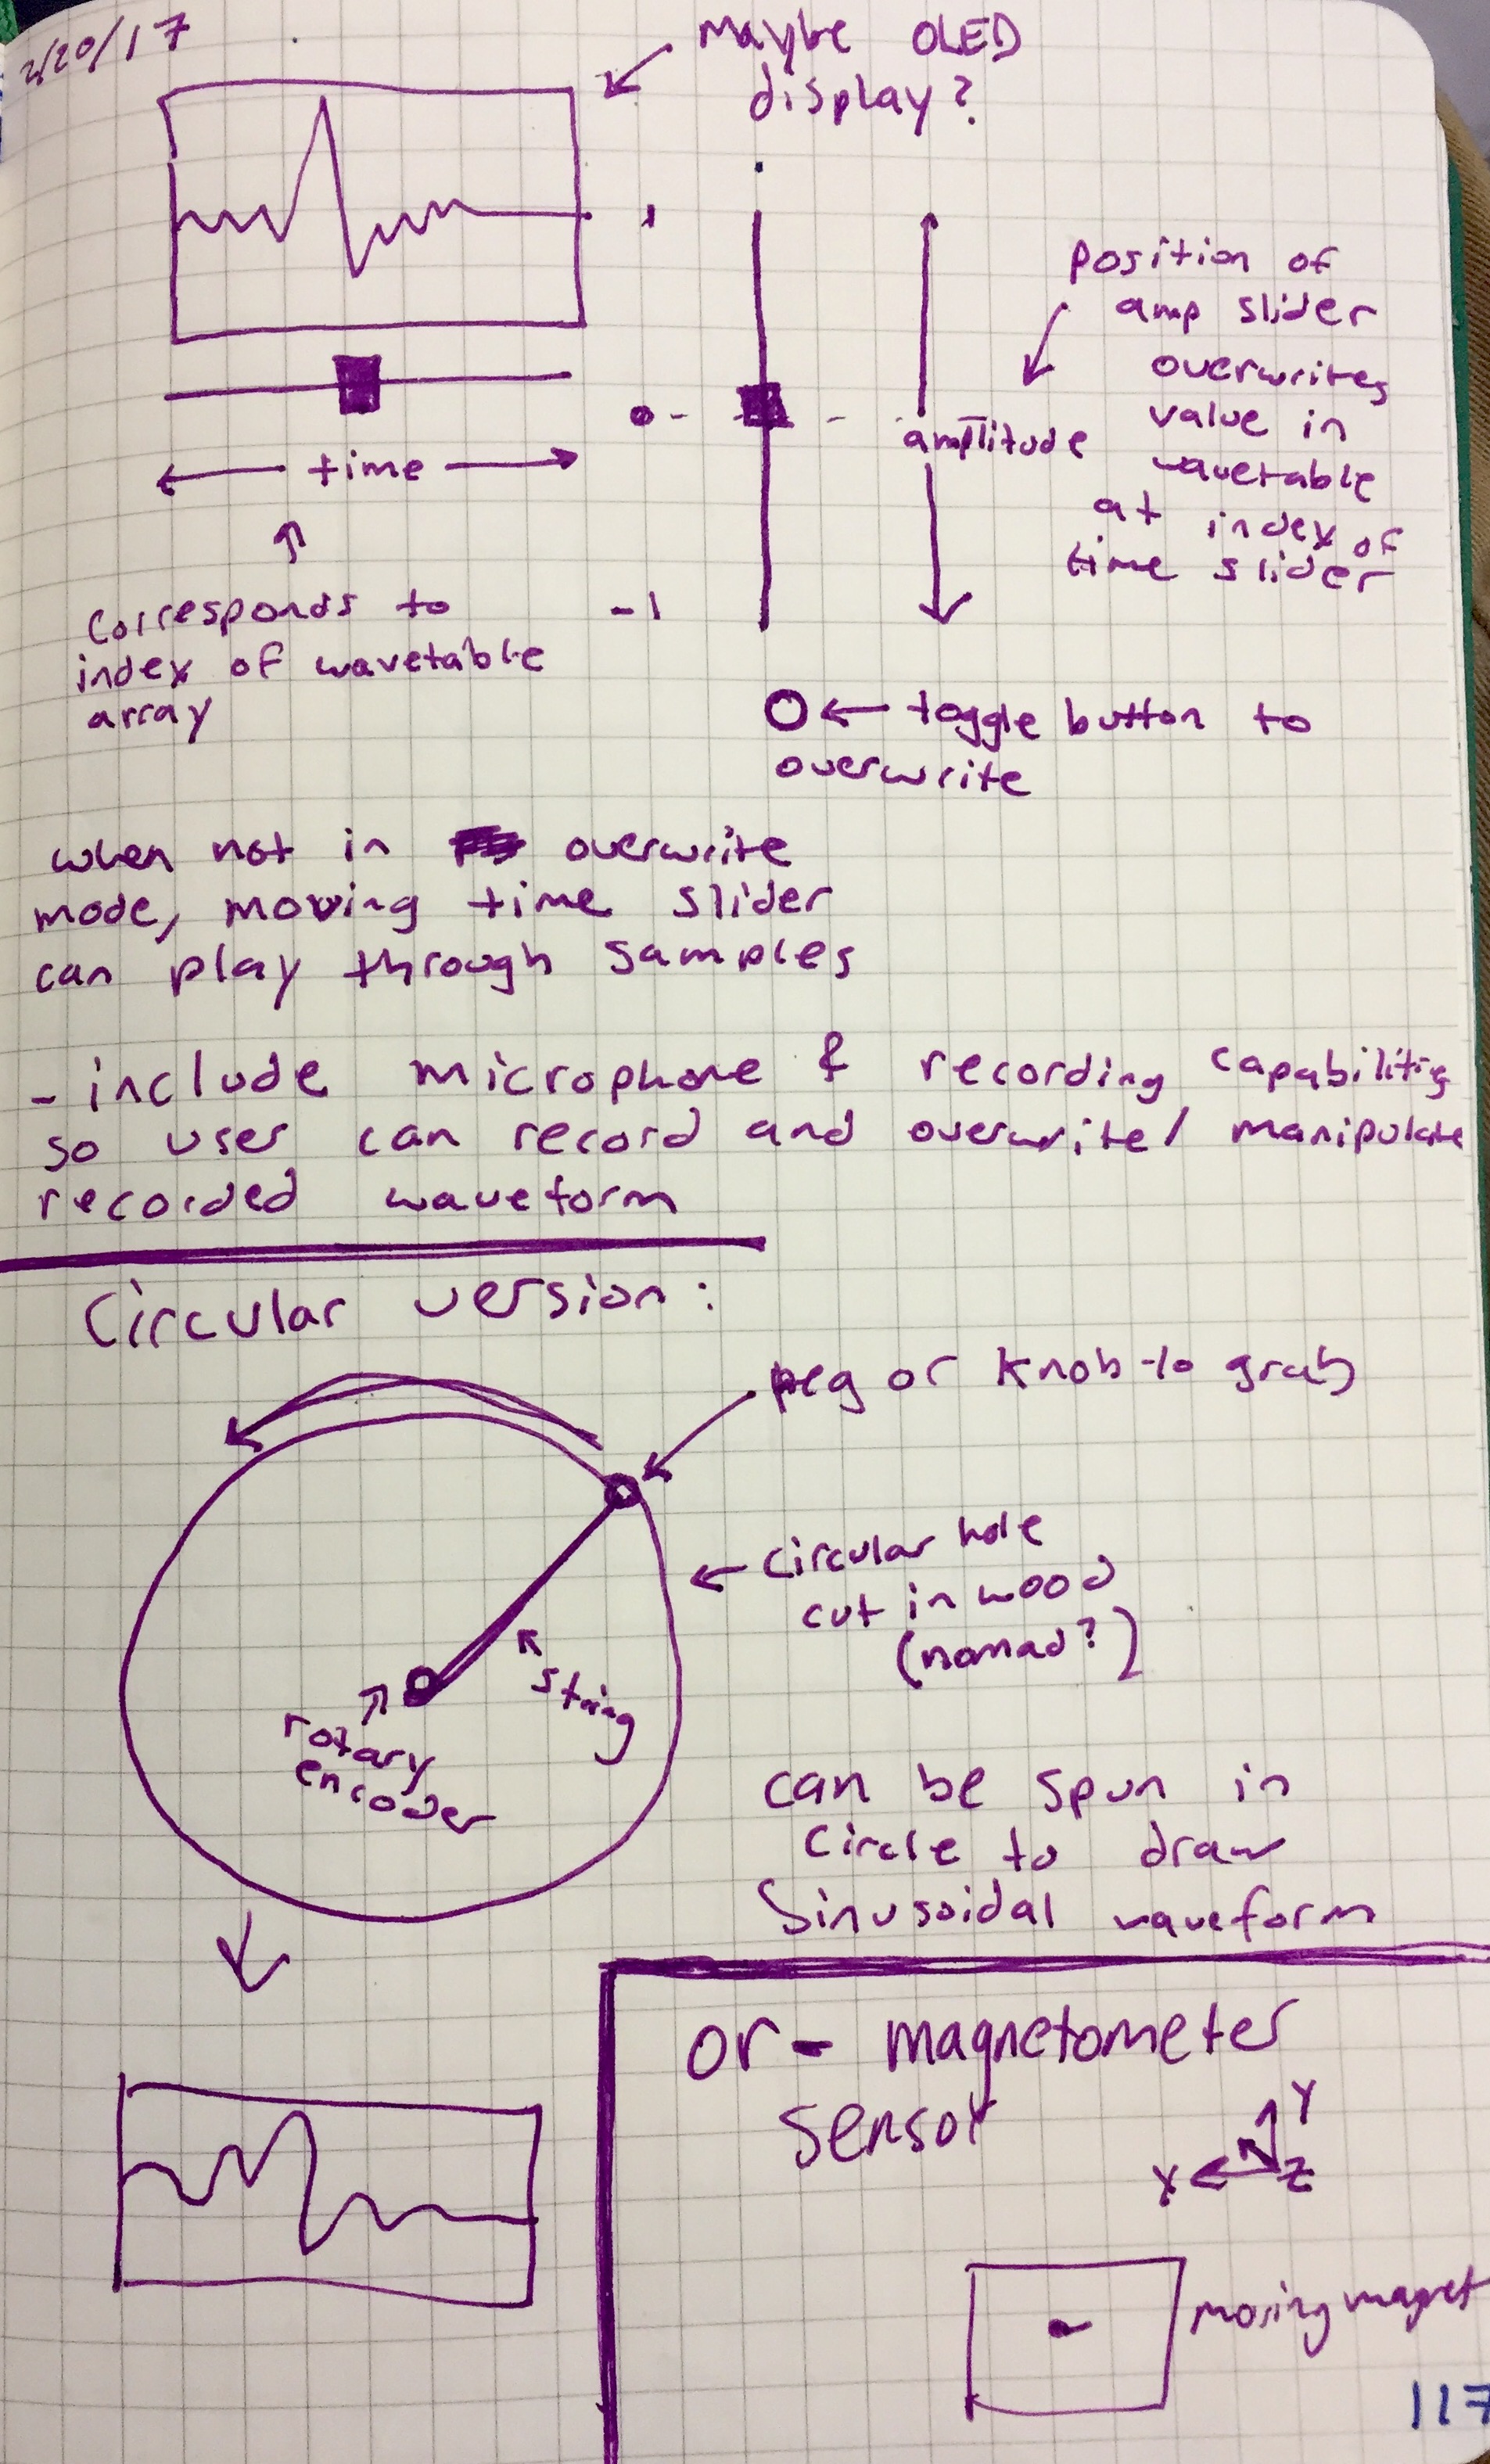
1) Waveshaper Box

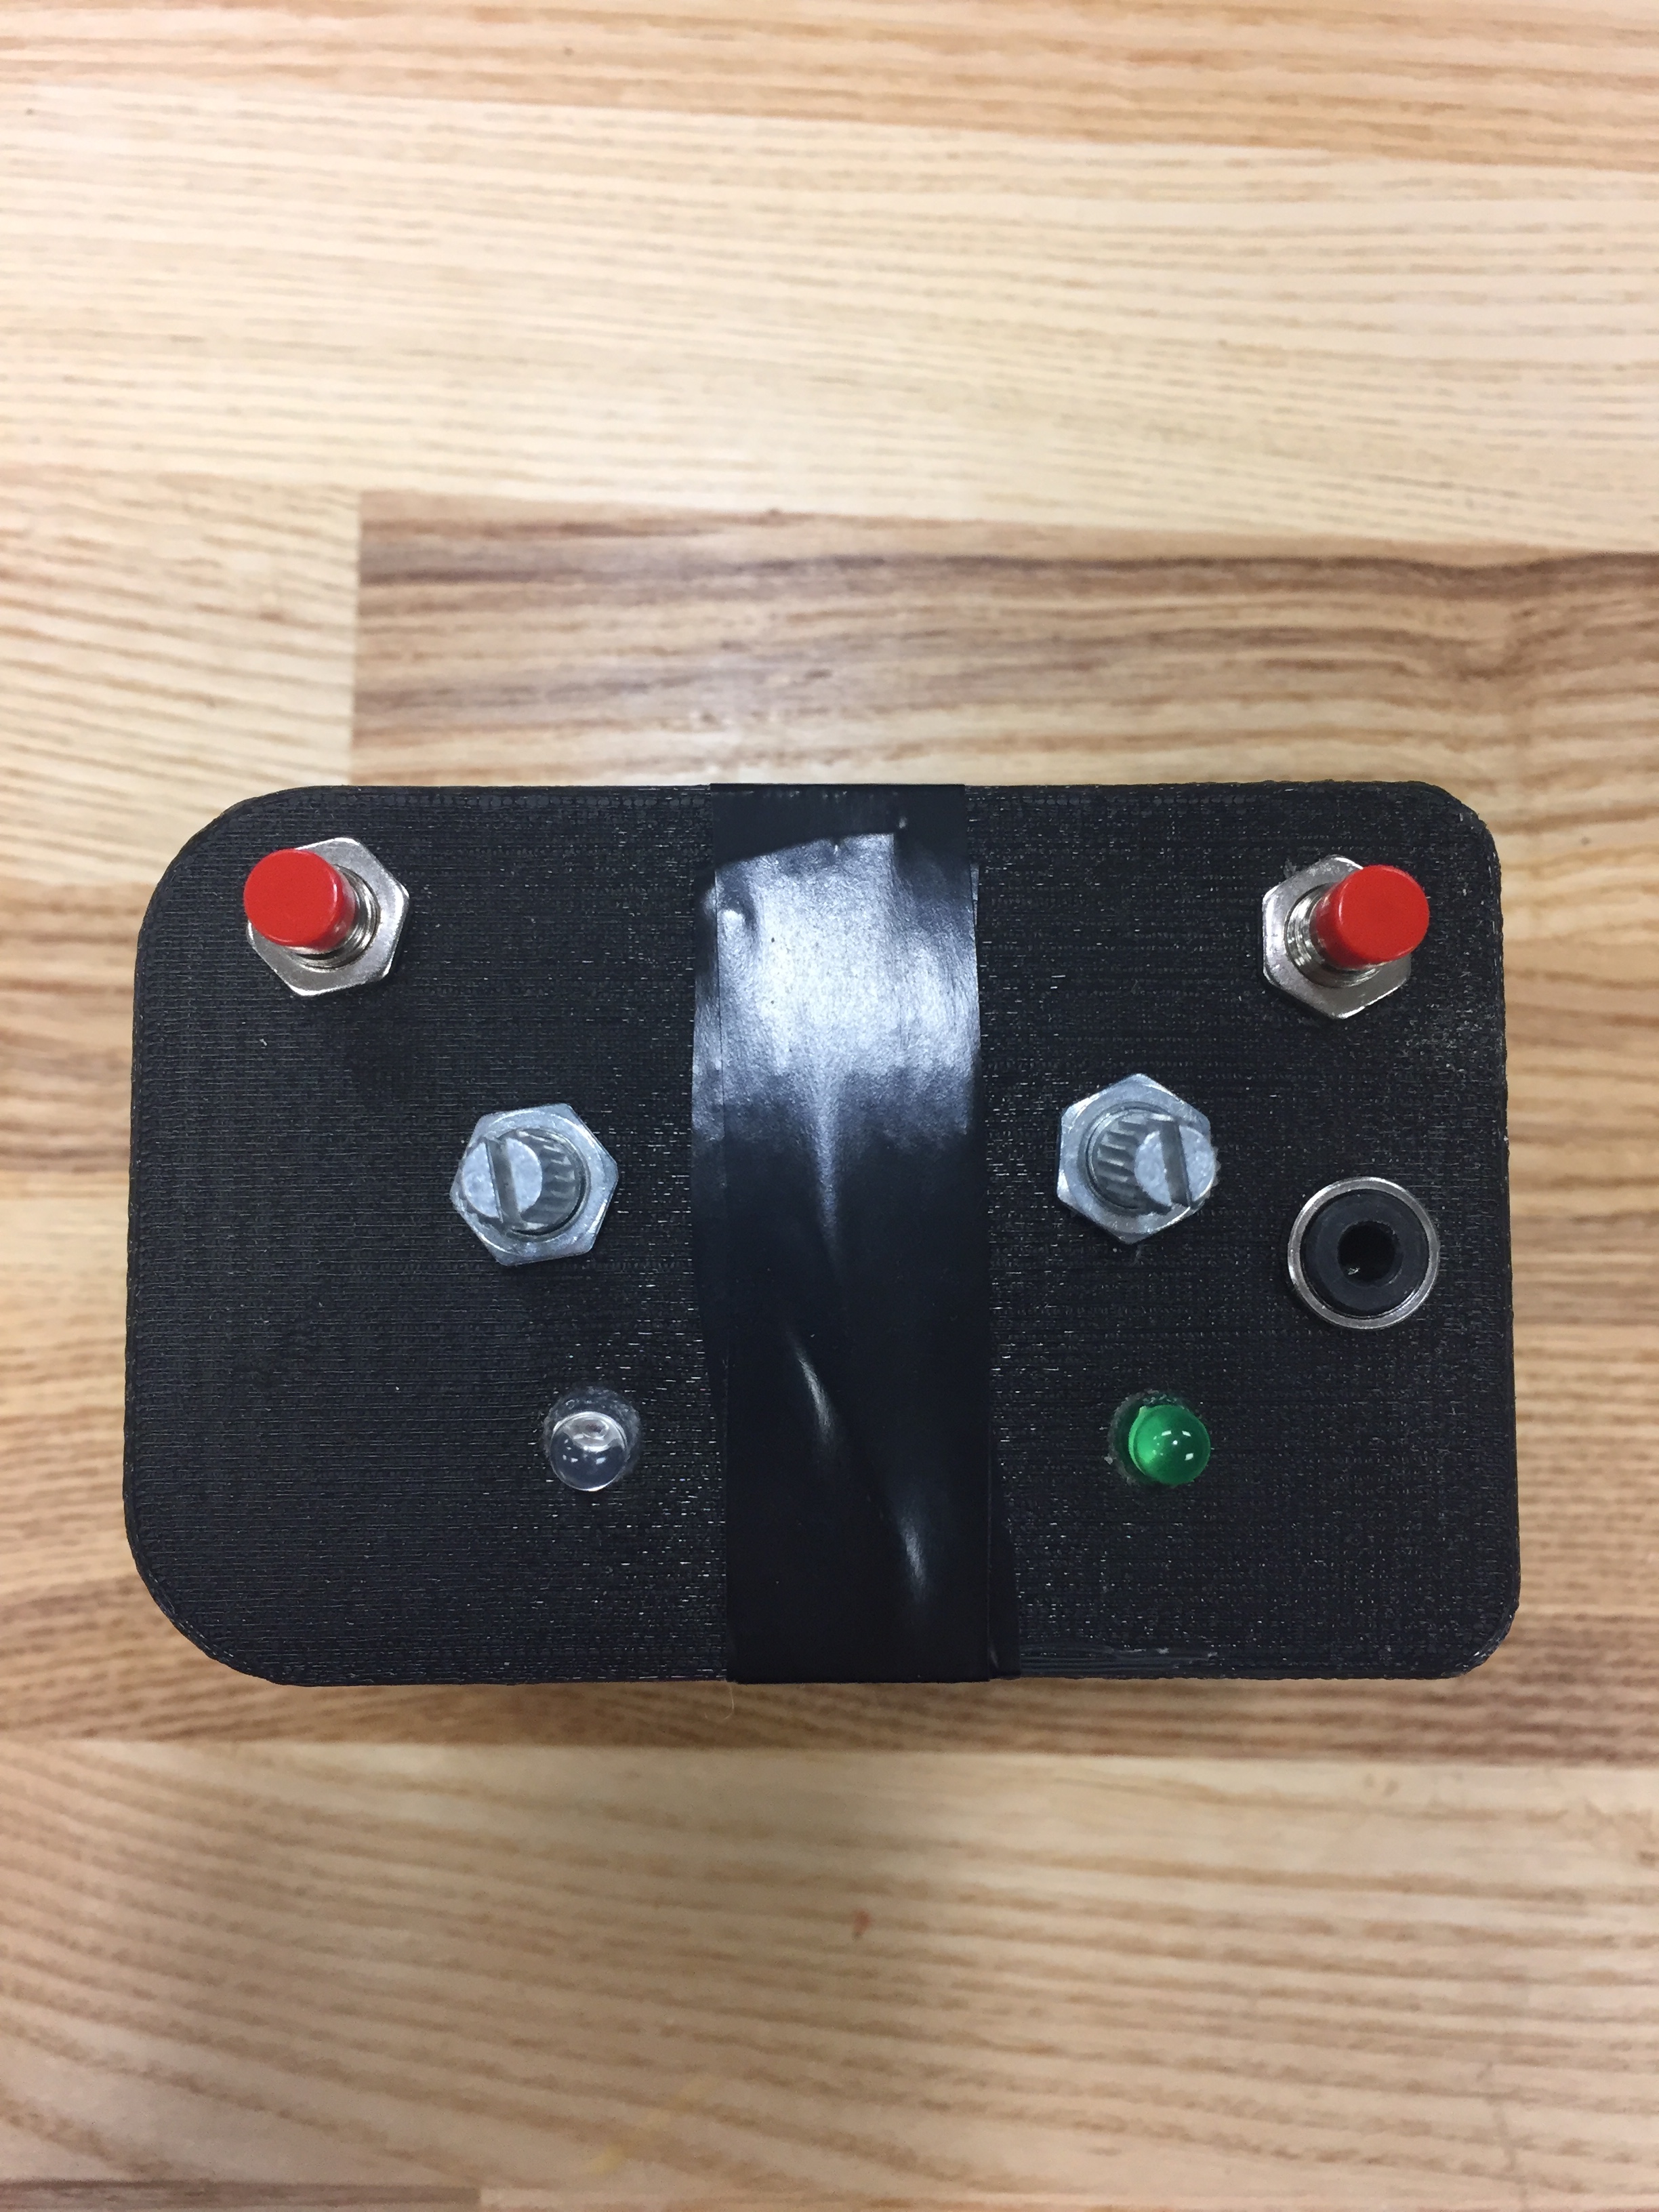
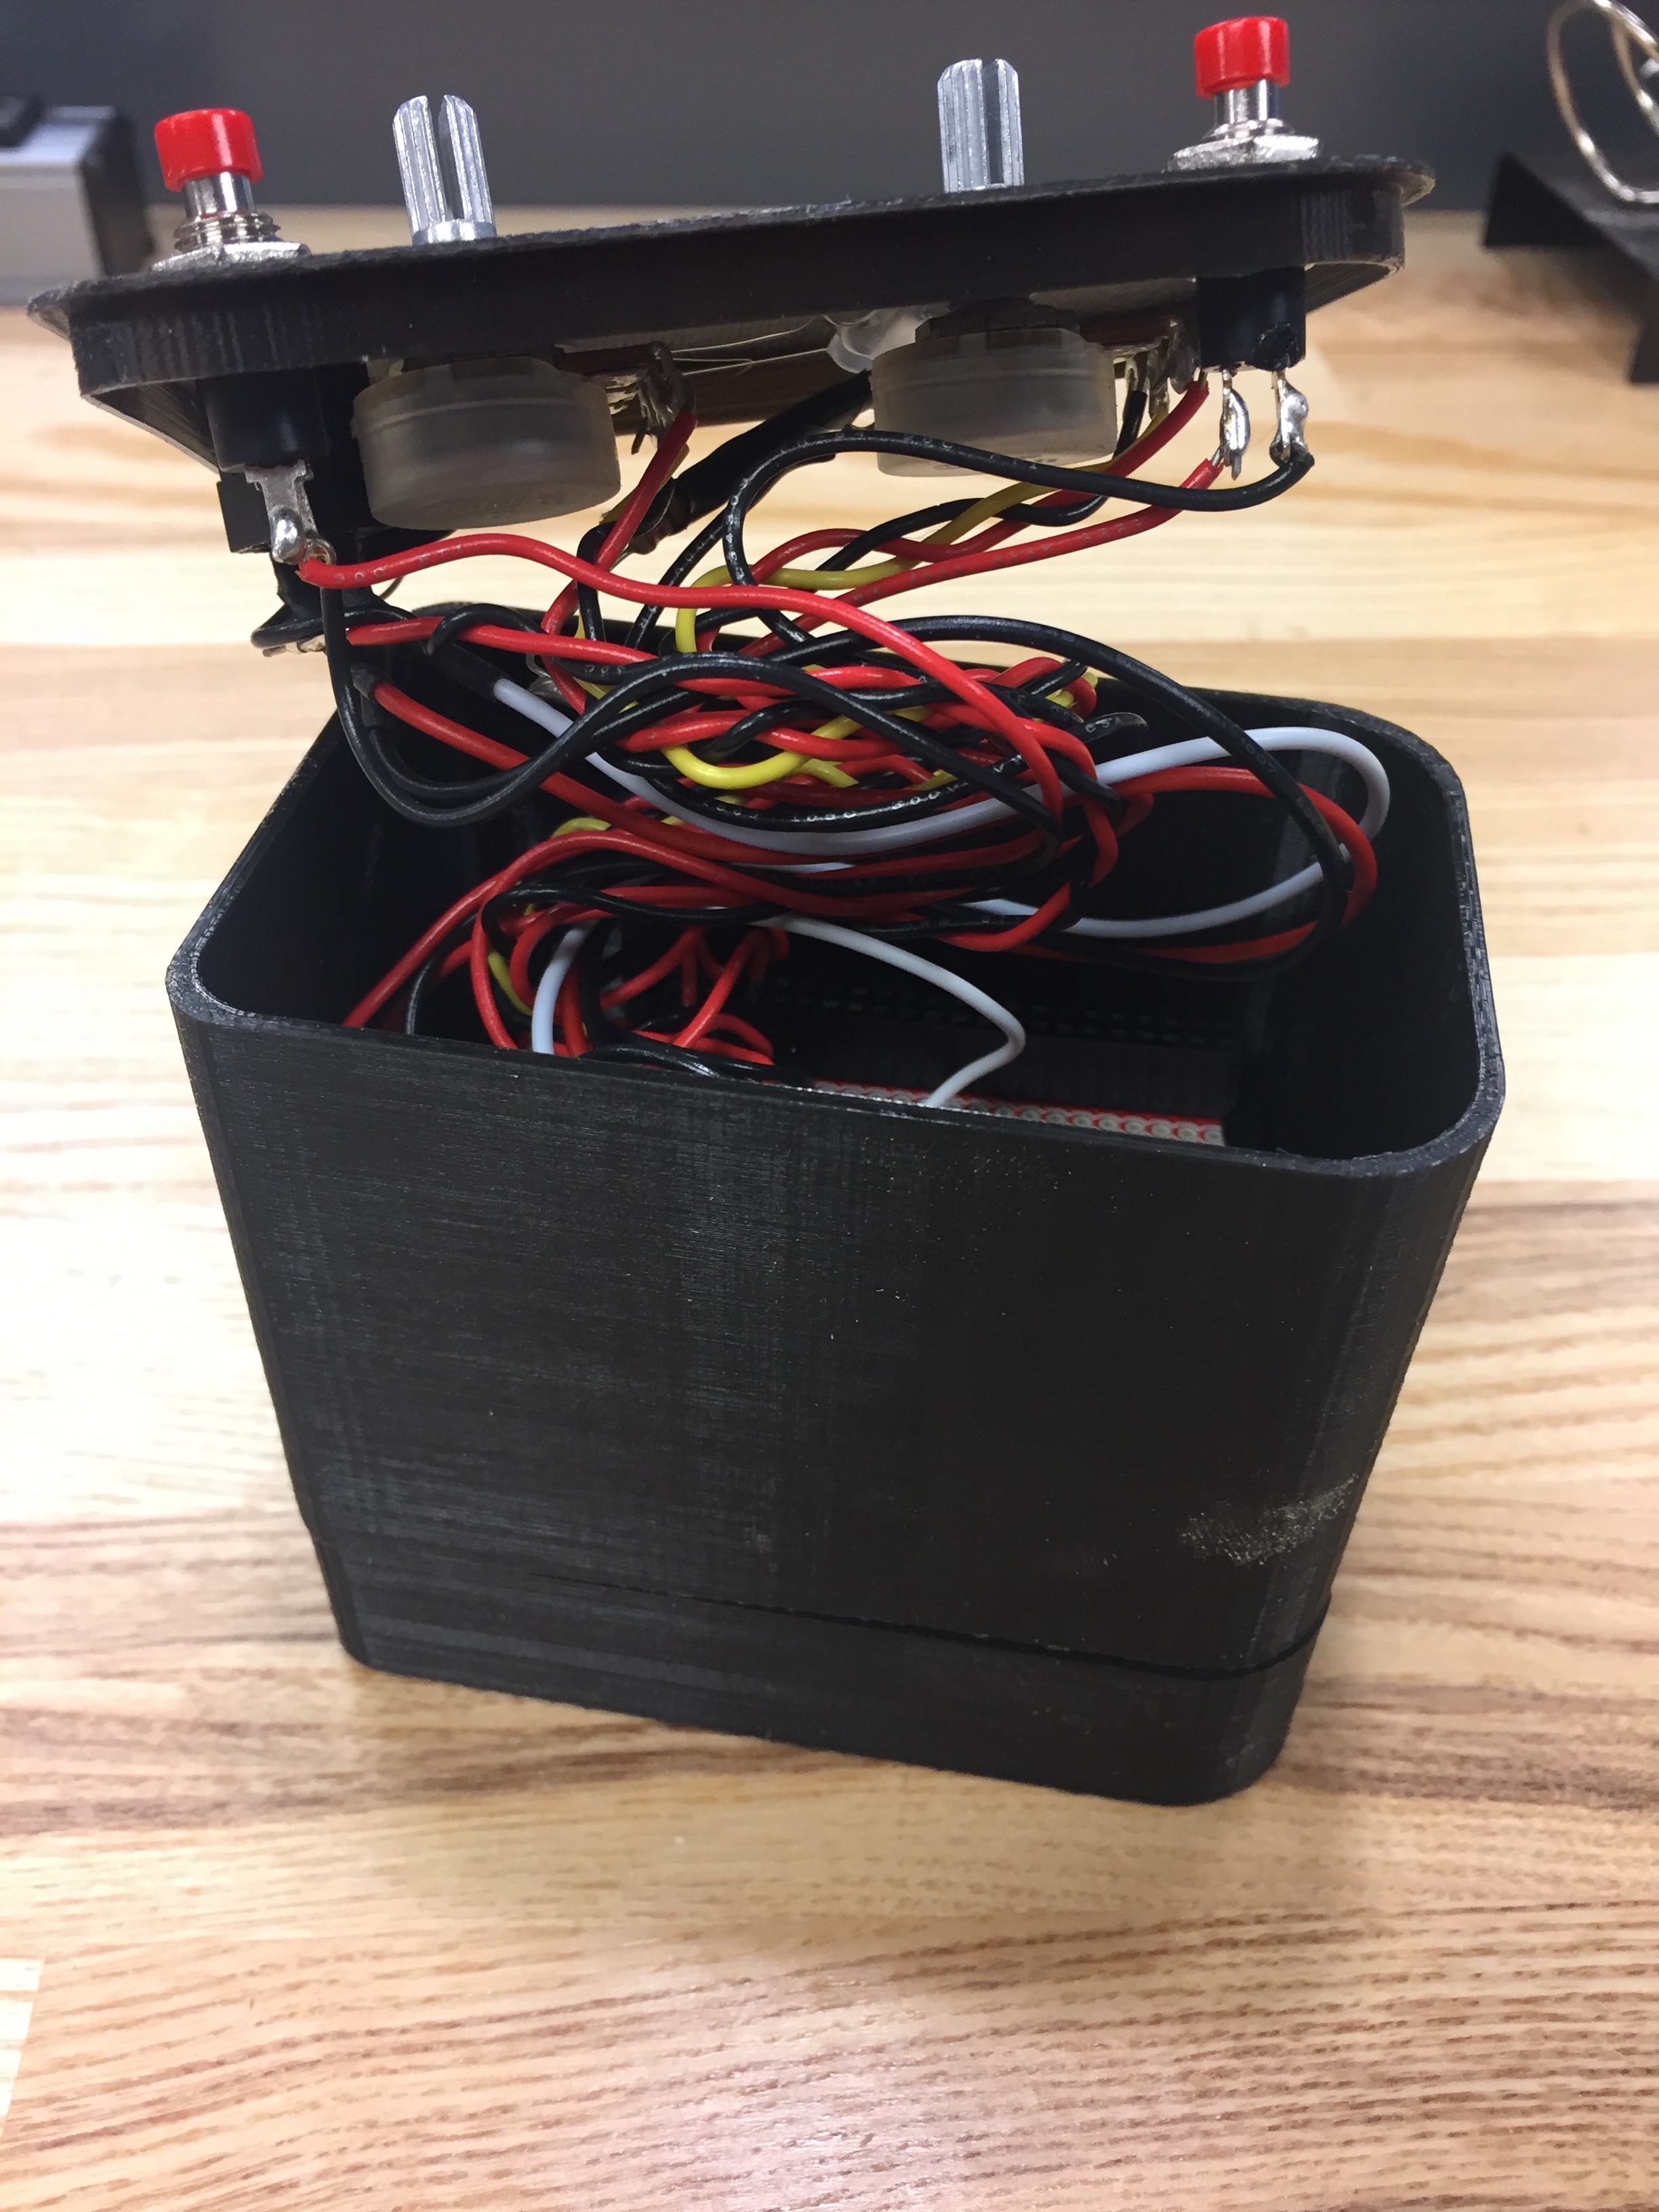
This idea would incorporate several slider potentiometers, rotary encoders, and buttons to create a waveshaping tool. The sliders can be manipulated to shape the waveform, with a pure data patch linearly interpolating between slider values. The rotary encoders at the bottom would function both as a button and as a step-wise input. The two buttons at the bottom would represent save and delete functionality. There are two modes: edit and play. In edit mode, the user could hold the save button as well as one of the rotary encoders, which would save the current waveform into that slot (there are 8 slots for different voices). Since the rotary encoders also have LED’s embedded within them, they would glow one color if the slot is empty, and another if the slot is full. In play mode, the user can play the existing voices by pressing on the rotary encoders which have a waveform stored in that slot. The sliders function as volume faders in play mode, and the rotary encoders can be incresed or decreased to change the frequency of the waveform. The interface would like similar to the sketch below:
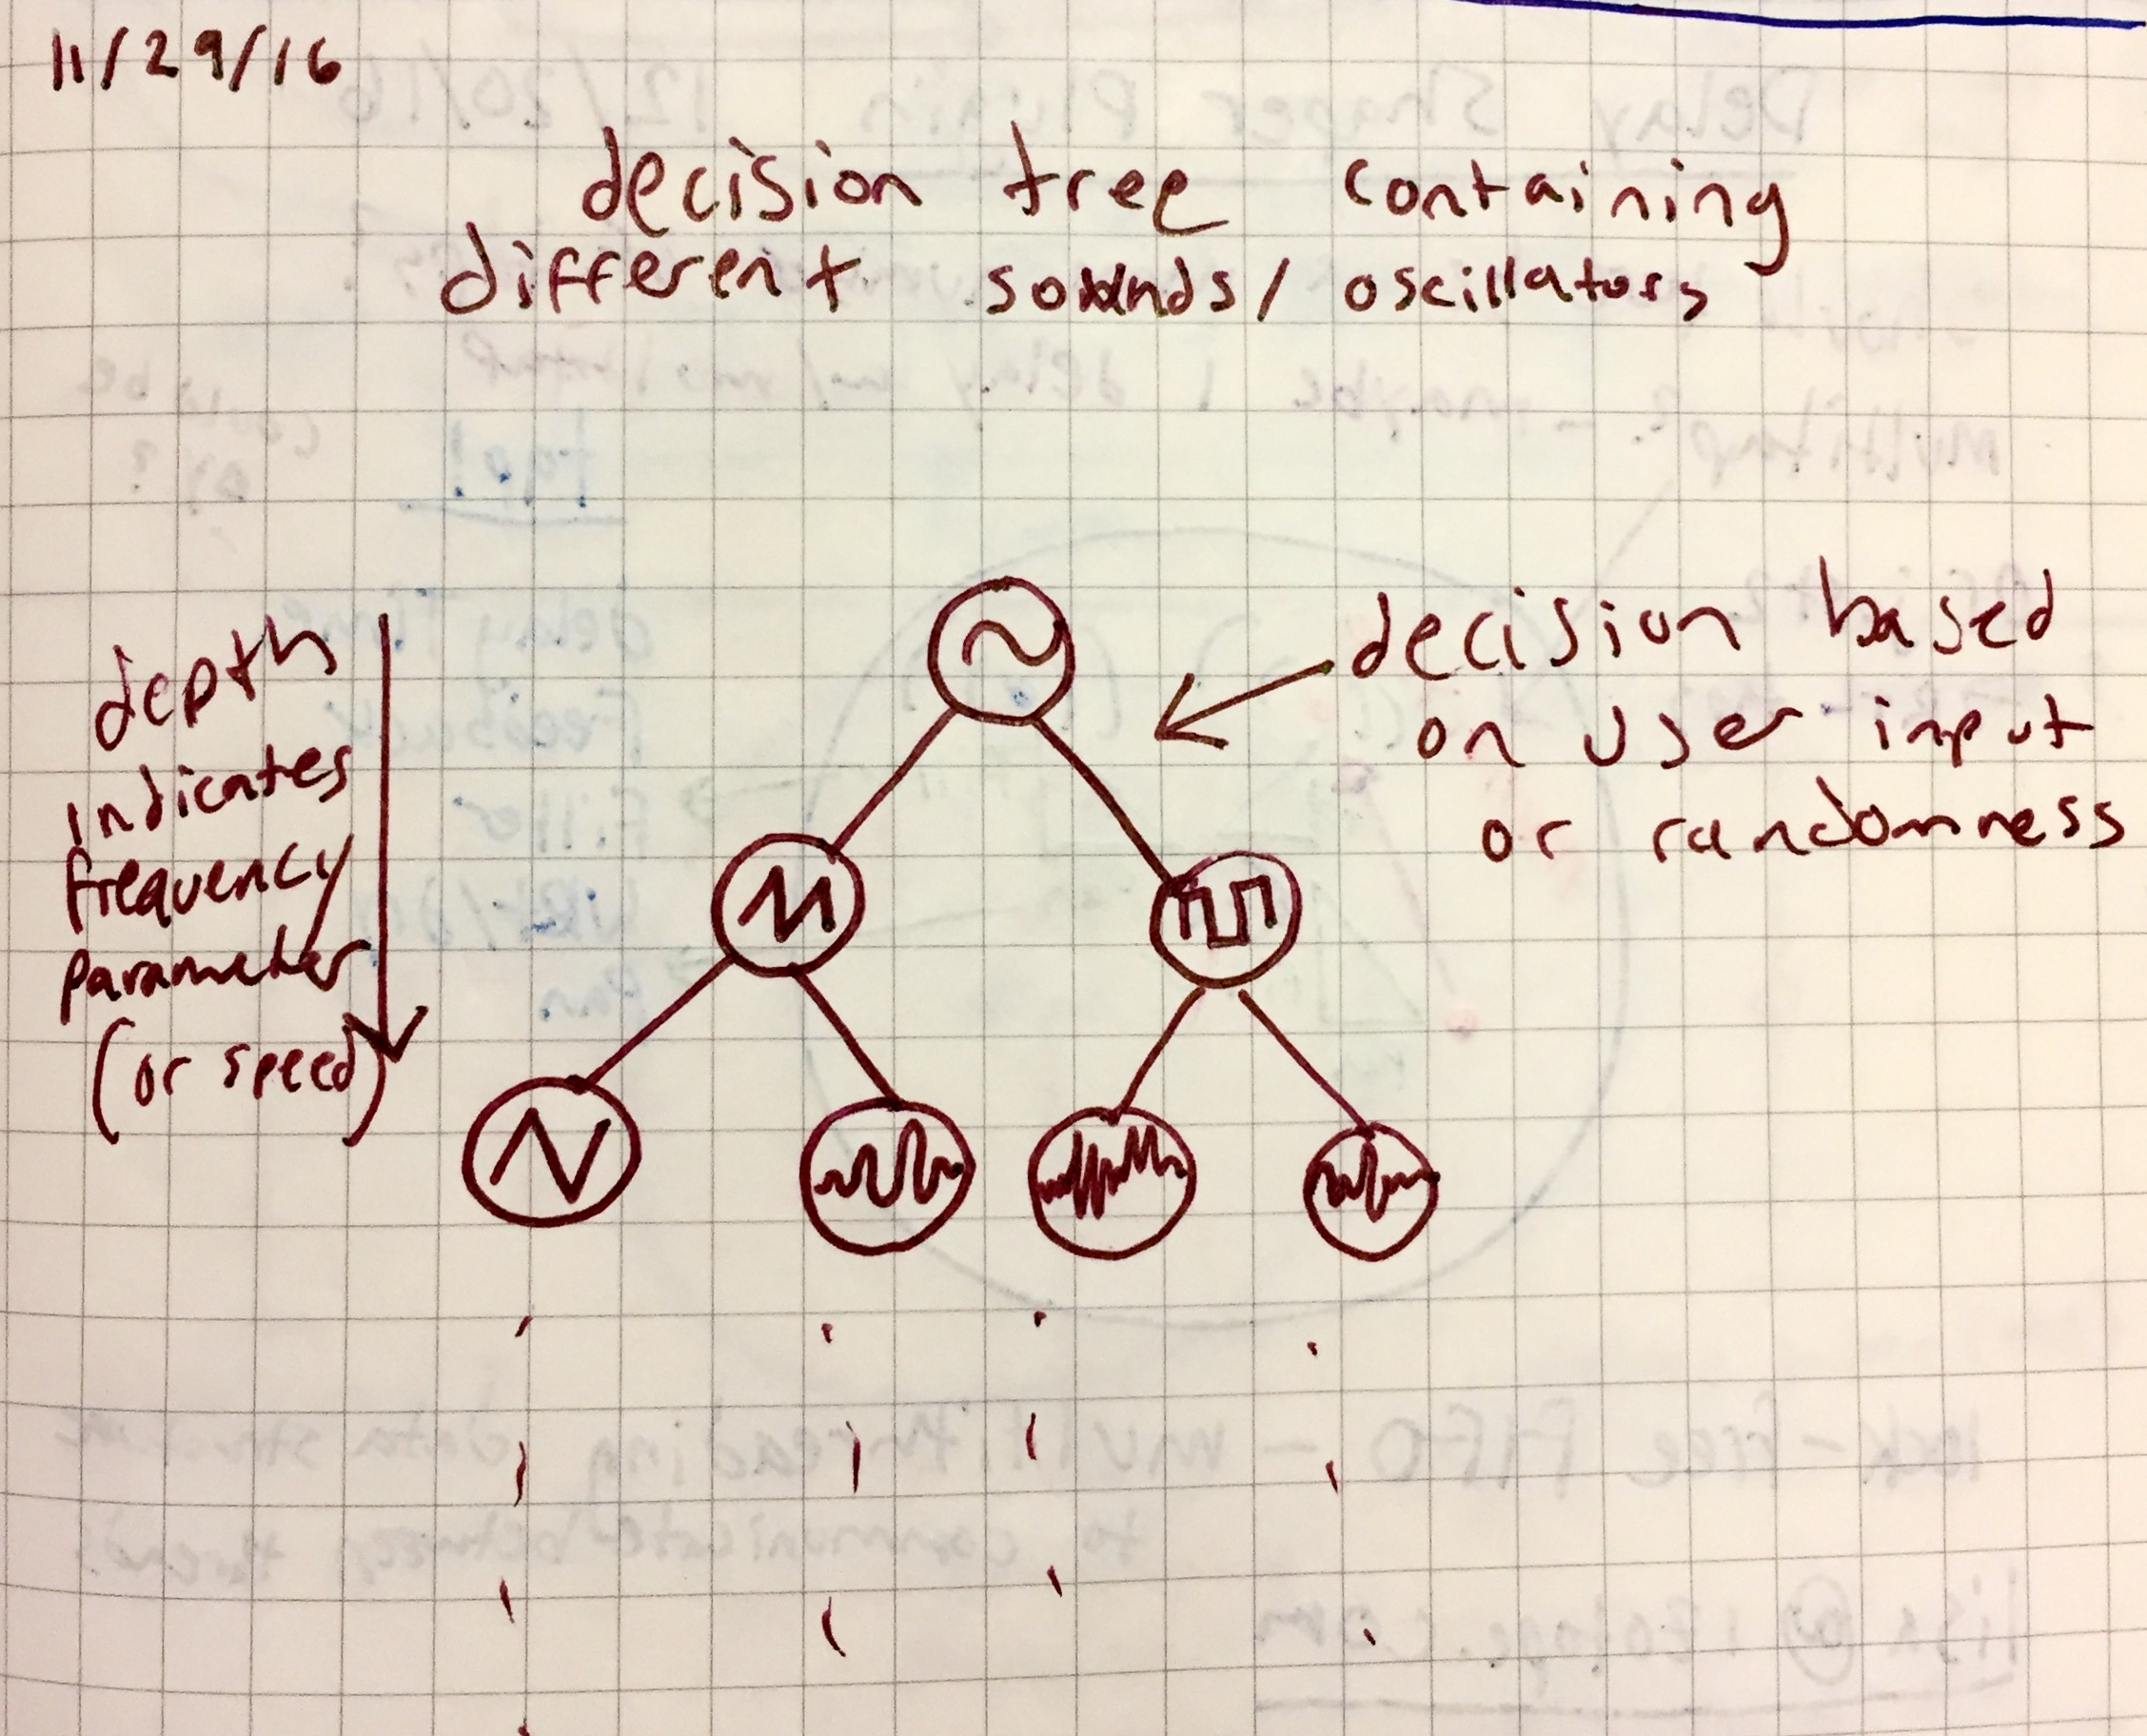
Waveshaper Sketch

2) Decision Tree

This instrument would store several sounds or waveforms in a binary tree data structure. The instrument interface would have several buttons in the shape of the tree below, and the user would interact by pressing the buttons to choose nodes. In each node of the tree there is stored a particular waveform or recording, and the user will select which waveforms to play. The farther down the tree, the higher the frequency or pitch of the waveform. Using these buttons, the user can play each waveform polyphonically.

Decision Tree Sketch

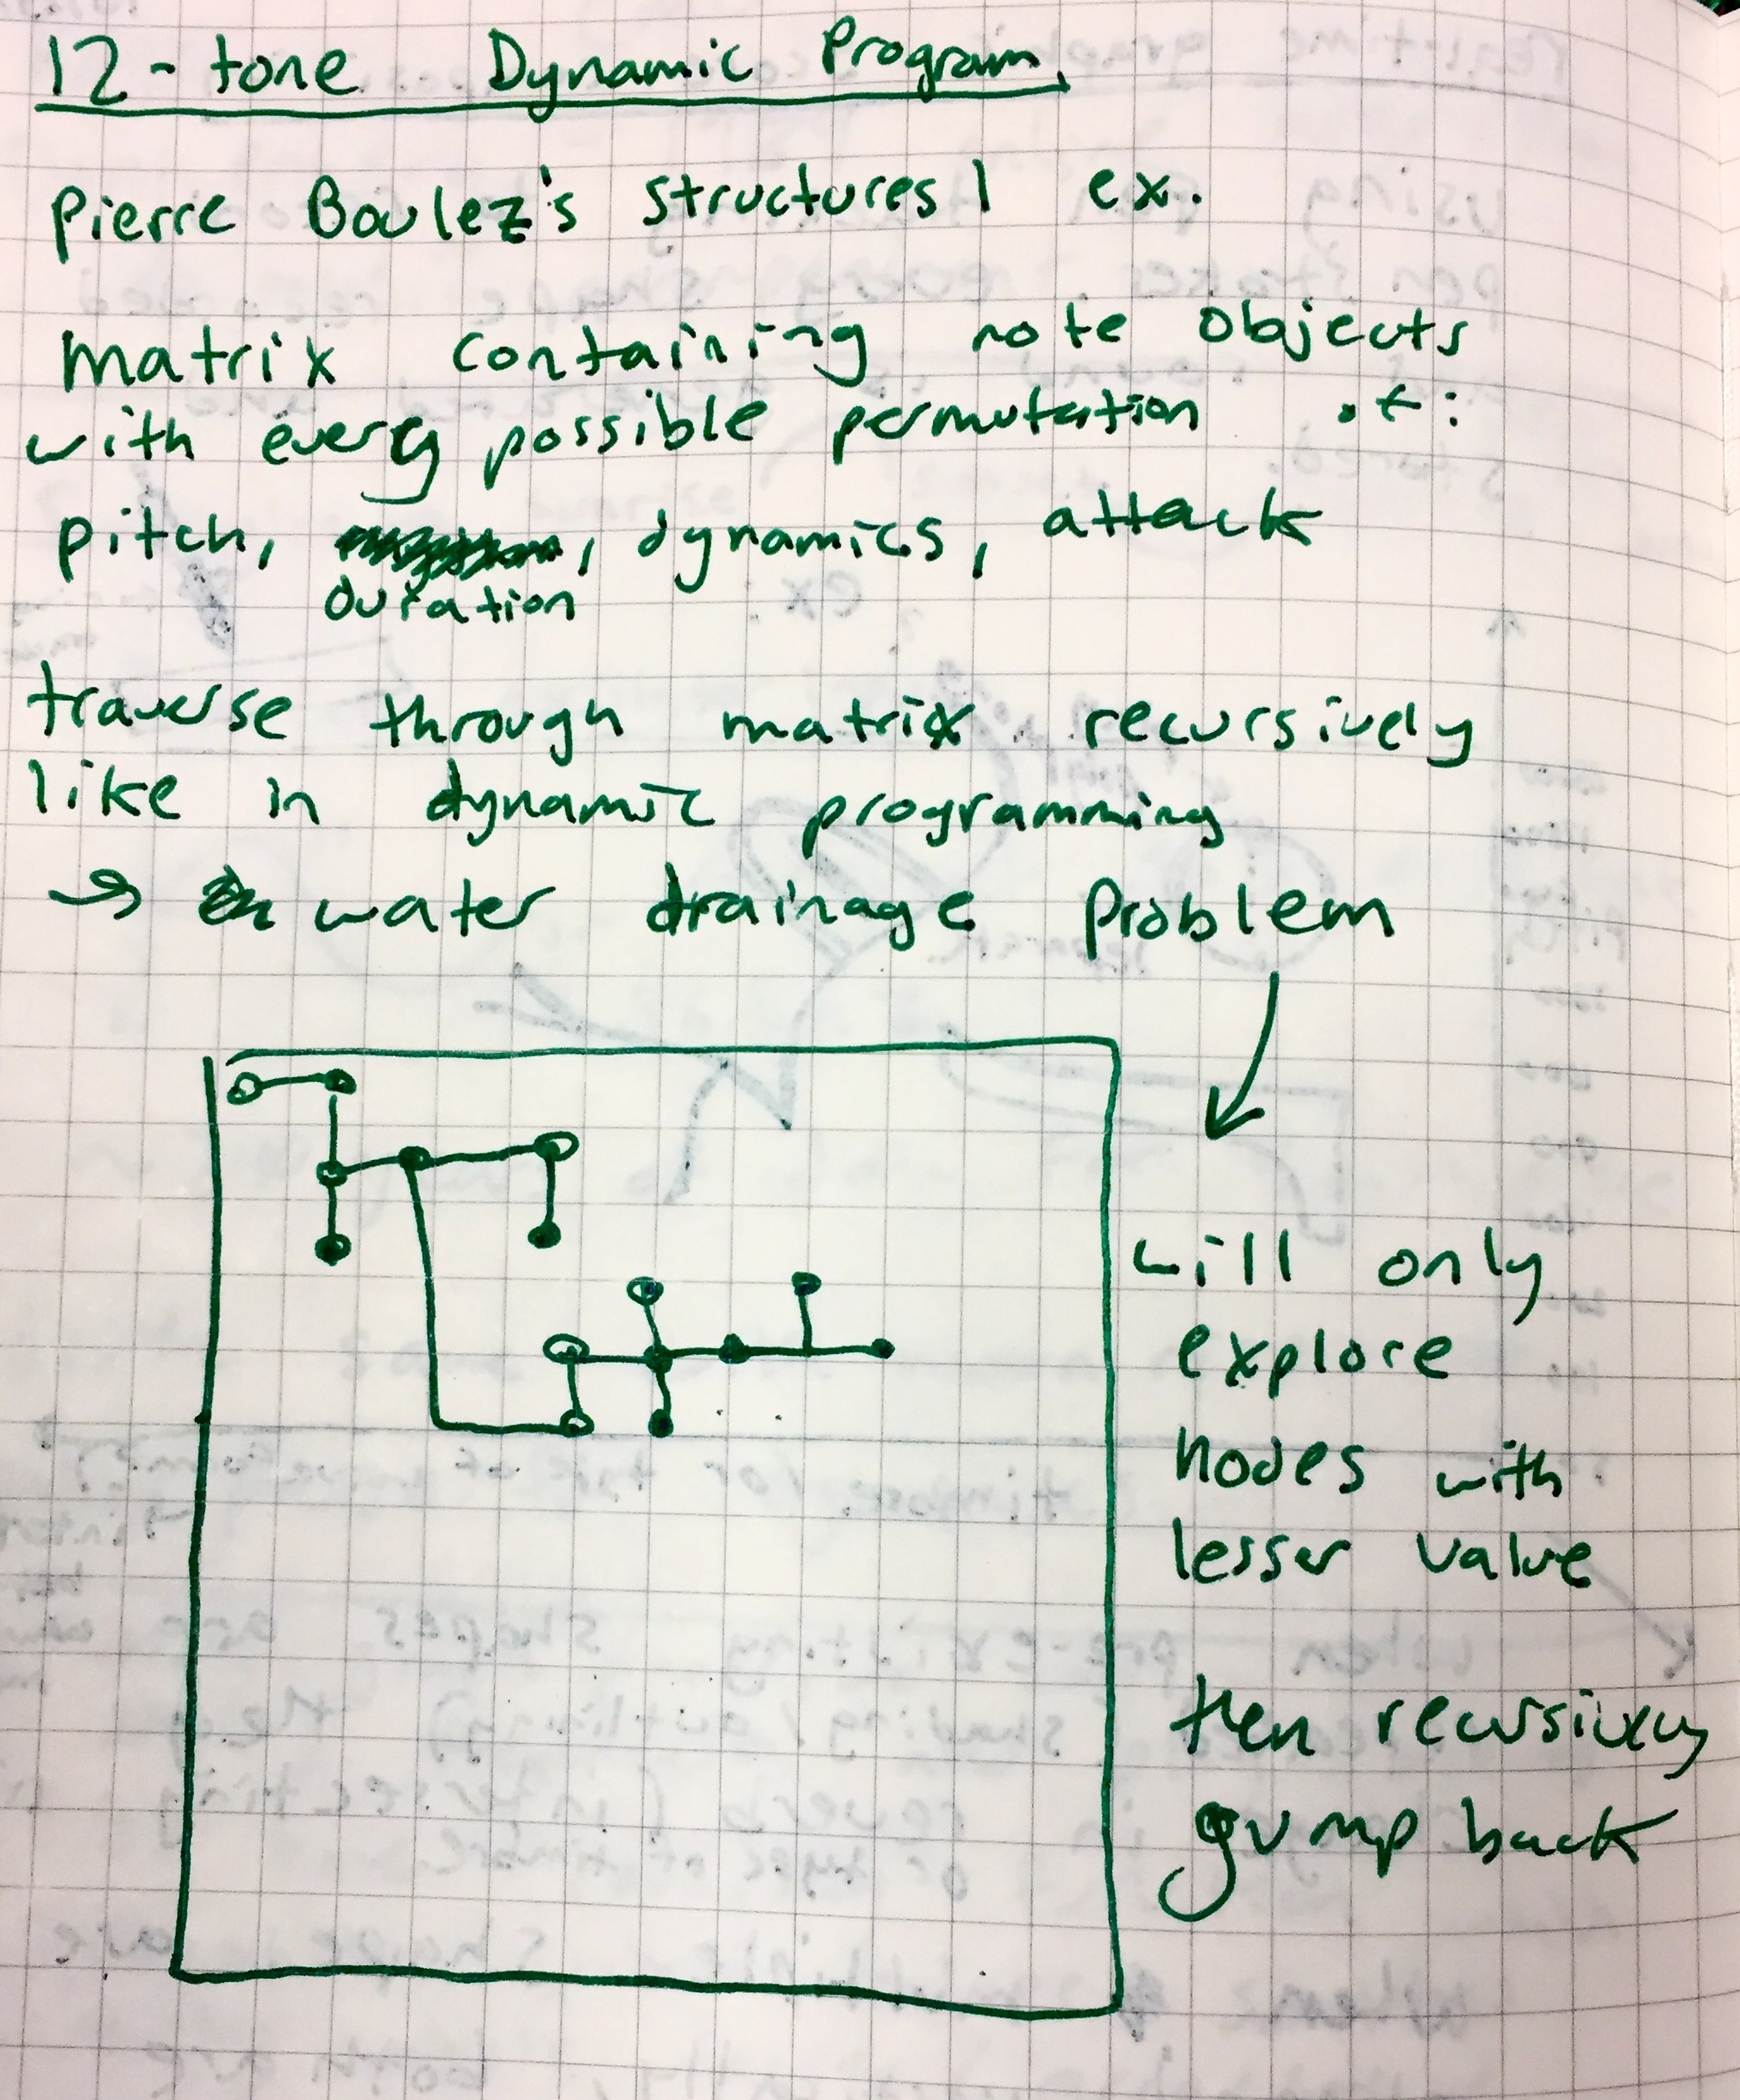
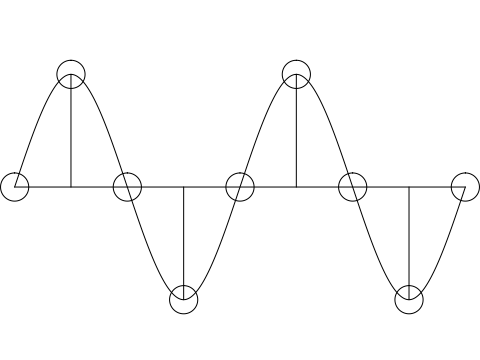
3) 12-tone Dynamic Programming

This instrument would follow similar compositions methods to Pierre Boulez’s Integral Serialism. The instrument interface would be a matrix of potentiometers and a button. There would be five iterations of programming the instrument. The first time, the user sets the pitch of each node in the matrix, next the duration, followed by the attack and release. In order to advance to the next setting, the user presses the button. Once all four have been set, the user presses the button once more in order to set the dynamic program. Here, the potentiometers represent the order in which notes will be triggered. Once set, the instrument will advance through every node using a dynamic programming algorithm, flowing from high to low. Once completed, every possible node will have been visited, playing each tone with its distinct characteristics no more than once. This process can be seen in the sketch below.

Dynamic Programming Sketch

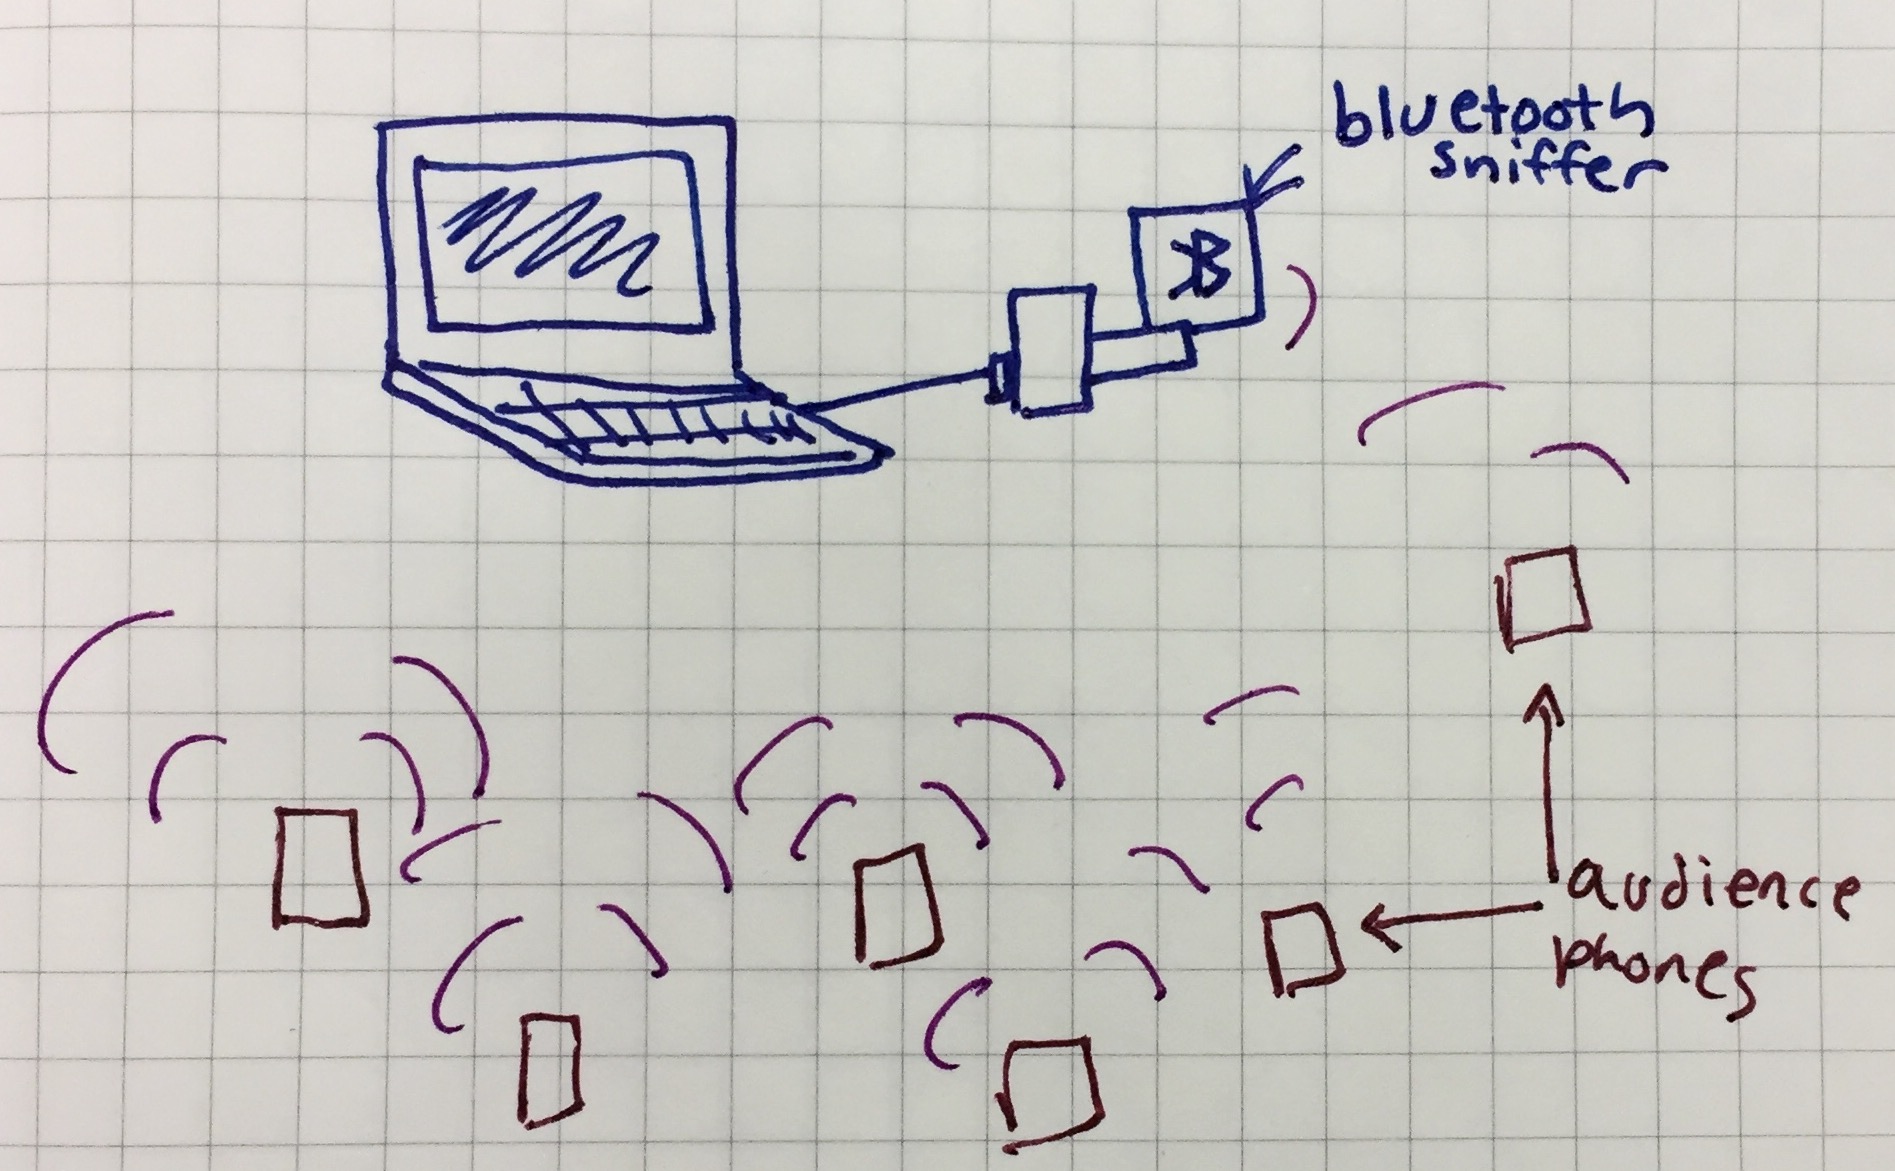
4) Bluetooth Sniffer

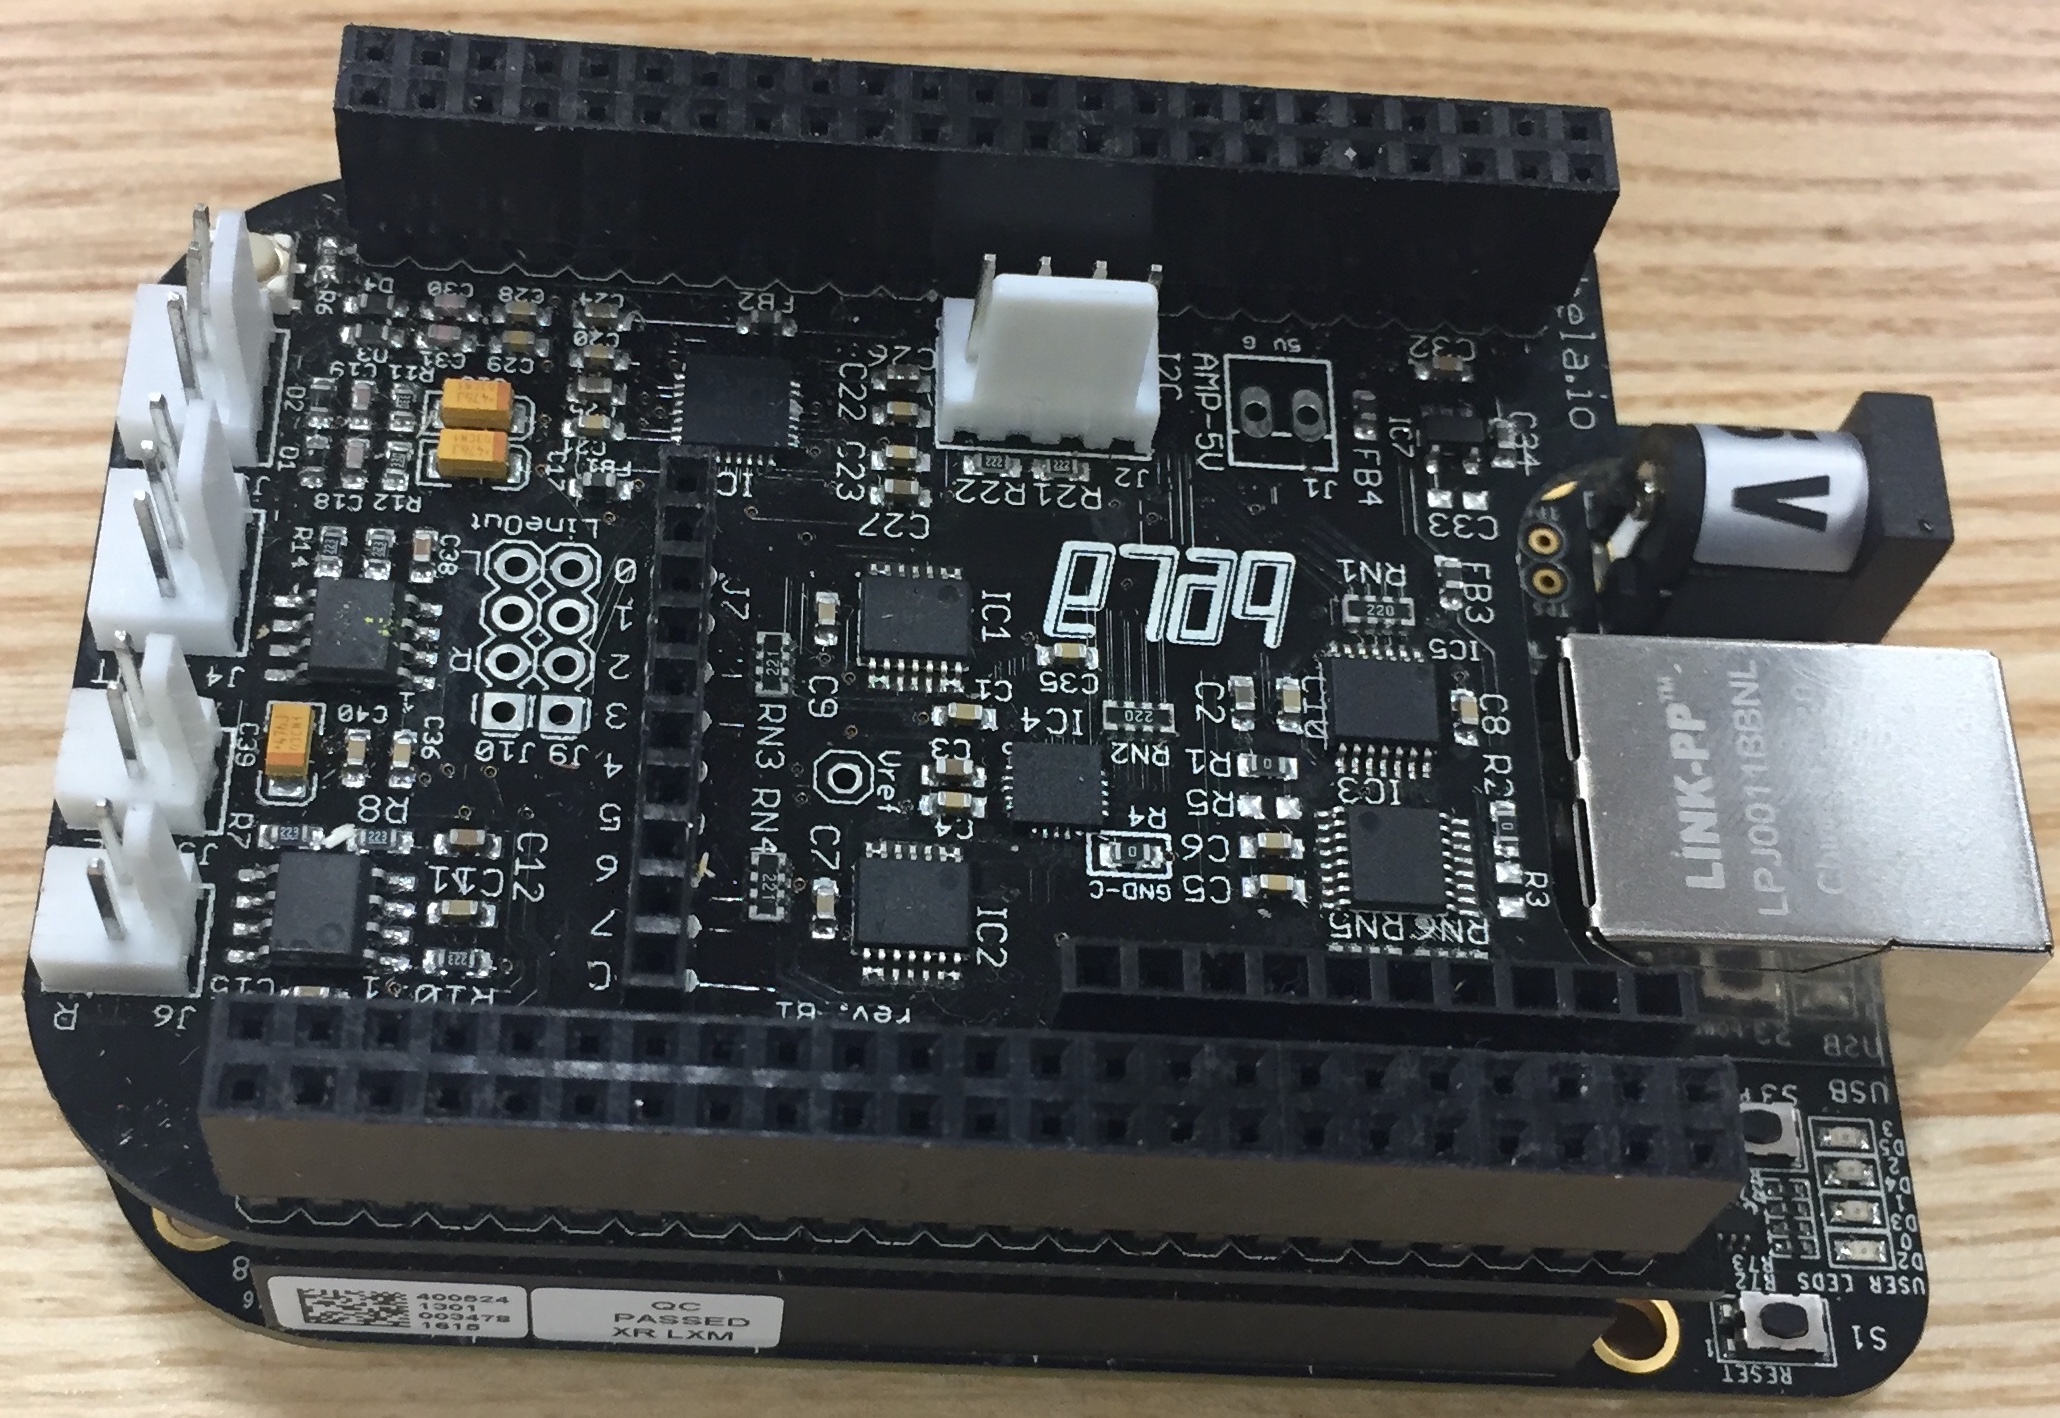
This instrument would incorporate a bluetooth sniffer which would detect nearby bluetooth devices. The number of devices will decide the number of voices that will be synthesized. For each bluetooth device there will be a tone generated whose frequency is the rate of information being transferred or distance from the sniffer. This idea is reliant on the possibility of using a bluetooth sniffer with the Bela device.

Bluetooth Sketch

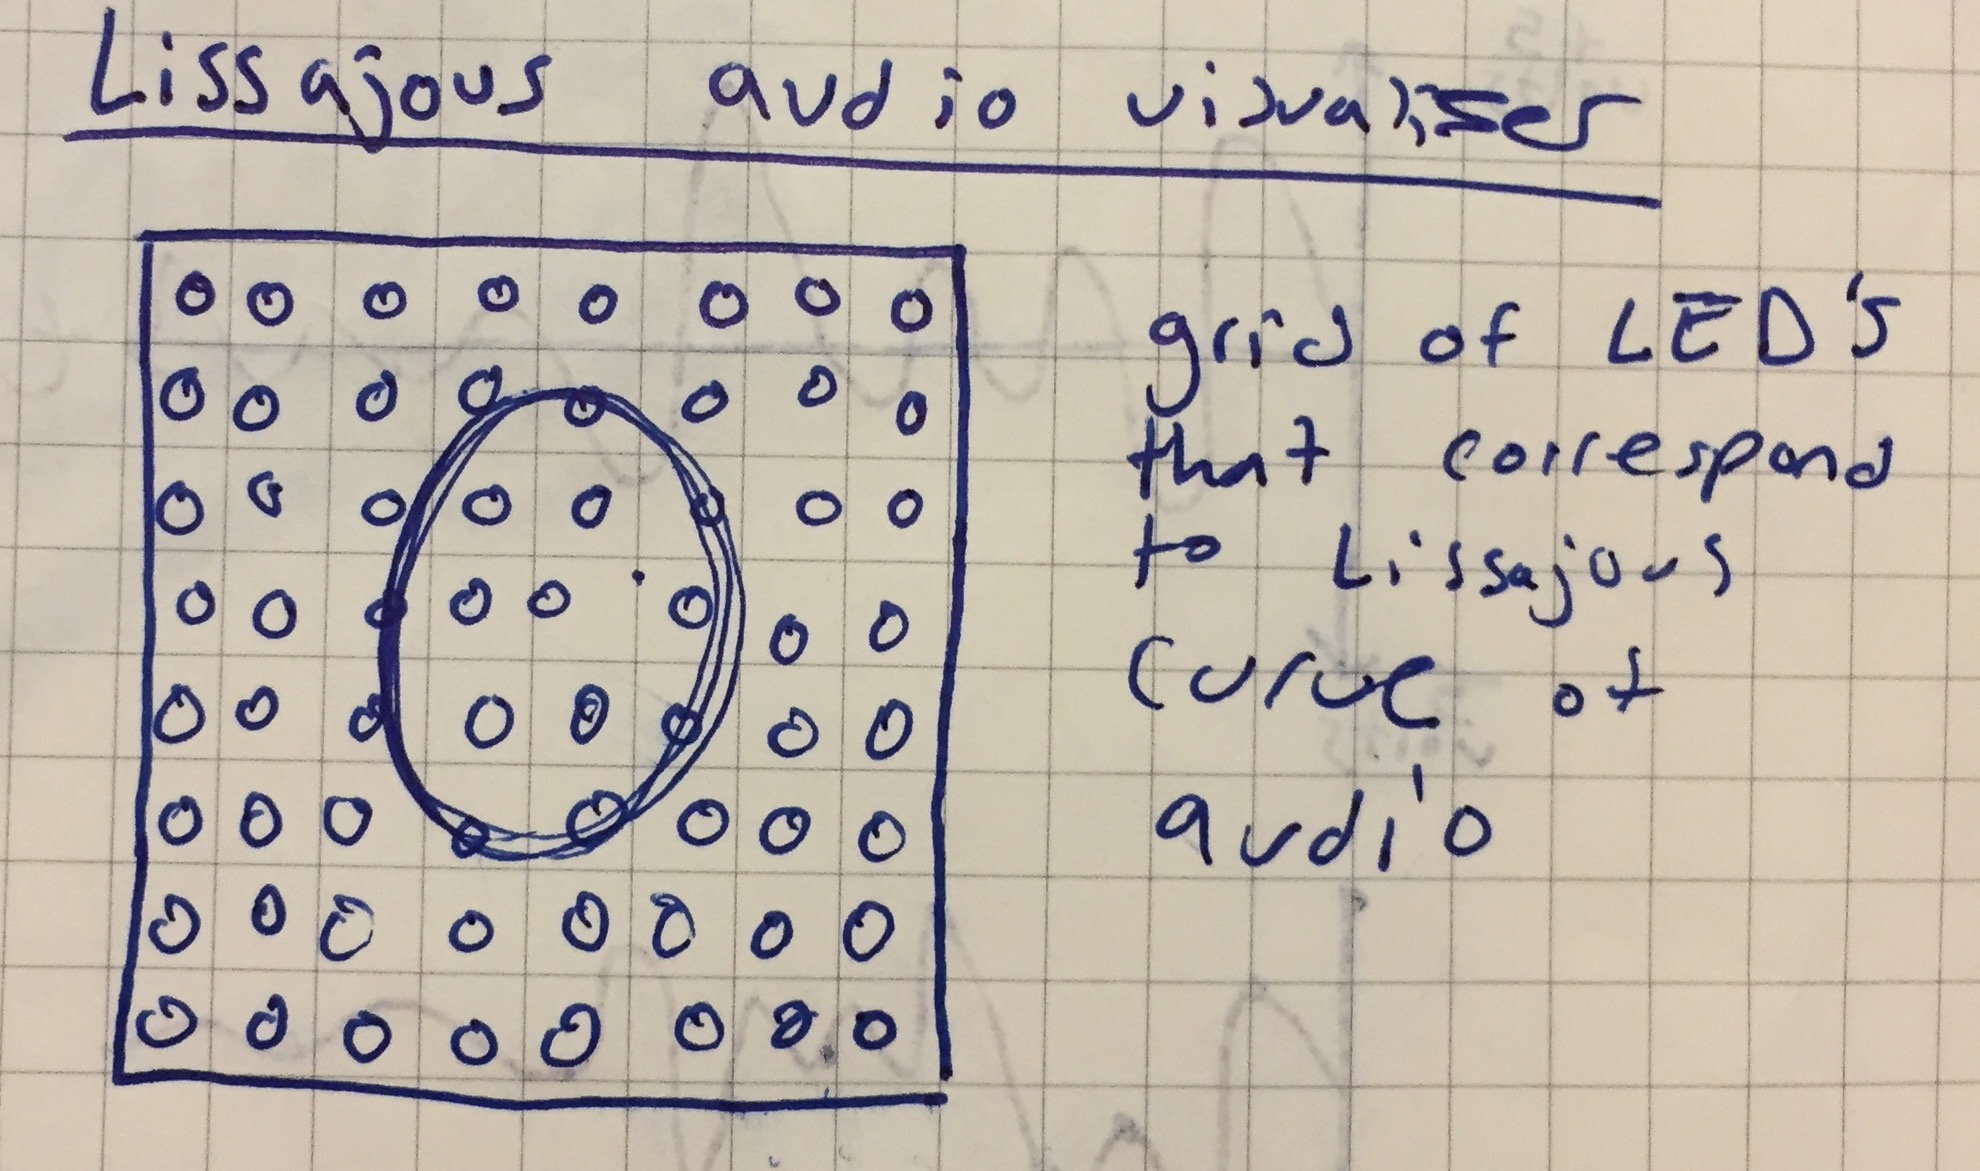
5) Lissajous Audio Visualizer This instrument would be more of a visualizer. There would be a matrix of LED’s which would take audio as an input and represent a lissajous curve. Each individual LED would light up as the lissajous spins around, creating a pleasing visual effect. I’m not sure if the Bela has enough processing power or enough inputs to do this one, but it could be an interesting attempt!

Lissajous Sketch

My first post!

Welcome to my website! This will be a location where I post ideas and projects. Stay tuned for more!